


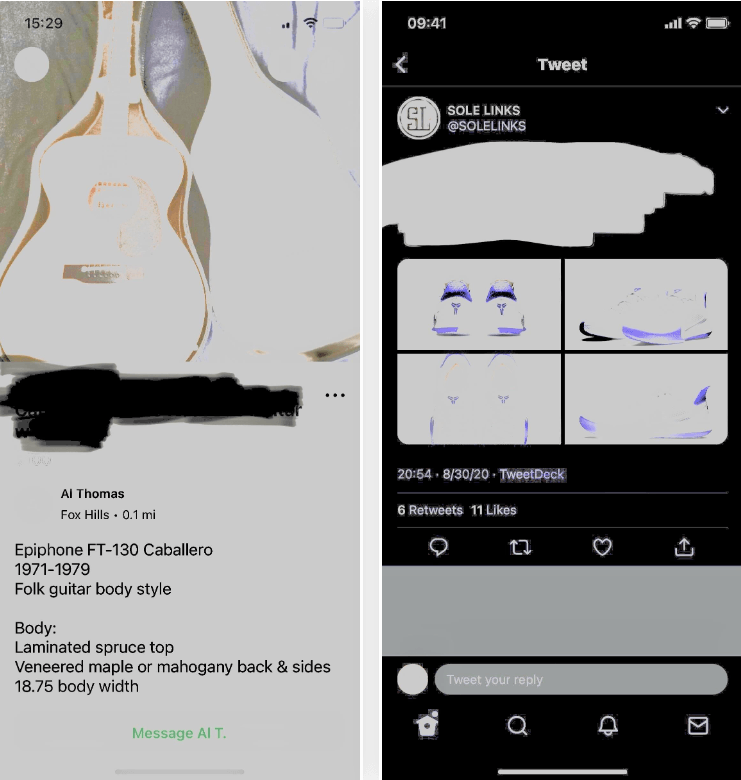
iPhone markup tools, especially white markers, are commonly used to hide sensitive or personal information in images before sharing them. However, this method is not secure because, with simple adjustments, hidden text can be revealed. On the other hand, you accidentally blurred the photo or neglected to save a backup copy.
Consequently, this article offers the most effective ways to understand and see through the white marker on the iPhone. It will also provide best practices for protecting your private or sensitive information, ensuring it is secure while editing.
How to See Through the White Marker on an iPhone?
Sometimes, you might encounter a photo where someone used a white marker to hide sensitive data, or there’s a surprise element. Fortunately, third-party apps and iPhone’s built-in editing tools help you see through the white marker. However, various factors can make this procedure simpler or more complex.
When editing an image, adjustable tools make it easy to reveal information if the white highlighter isn’t applied too thickly. Moreover, the background, the marker (highlighter), and the color of the text could make this process more difficult.
For example, removing the highlighter is easier if dark or black text has a light background. However, it’s more challenging to see through the image if the text has a light color and the background has the color. Despite this, here are some prominent editing methods to reveal the hidden information behind the white marker.
Using iPhone’s Built-in Editing Tools
iPhone has a built-in feature to clear or reveal blurred or white-marked texts or images, but it can be better. However, you can still view the hidden information by following these steps:
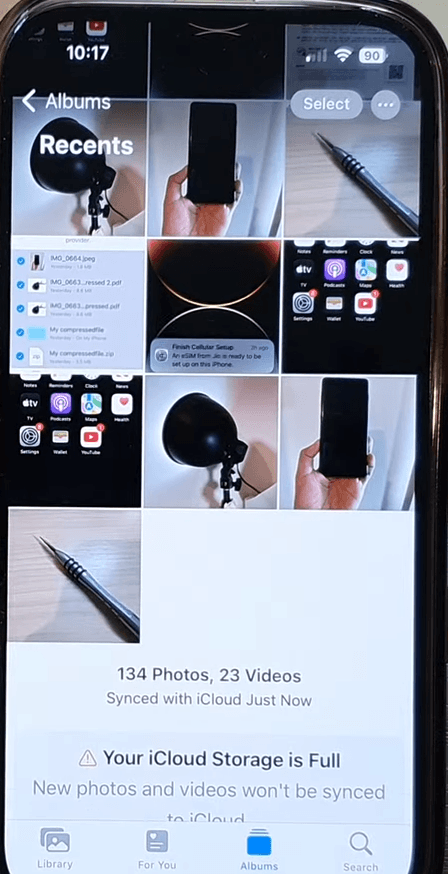
Step 1- Selecting the Image
- Go to your “Photos” app and select the image or screenshot with the white marker
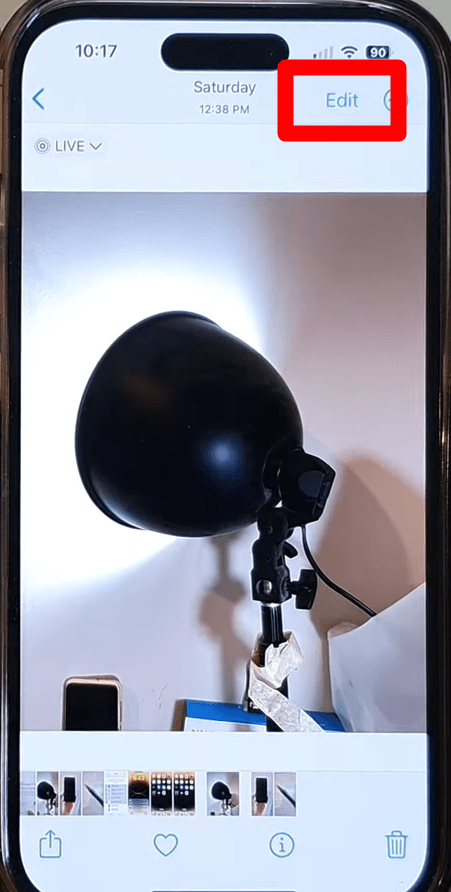
Step 2- Editing the Image
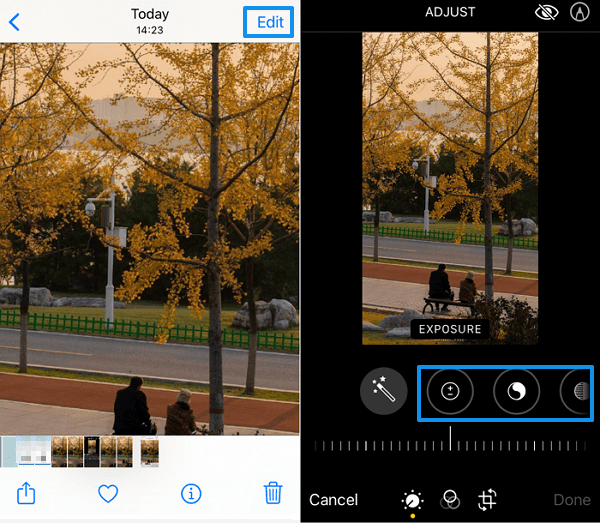
- Click the “edit” button from the top right side of the screen
- On the bottom of the screen, there are different edit setting options
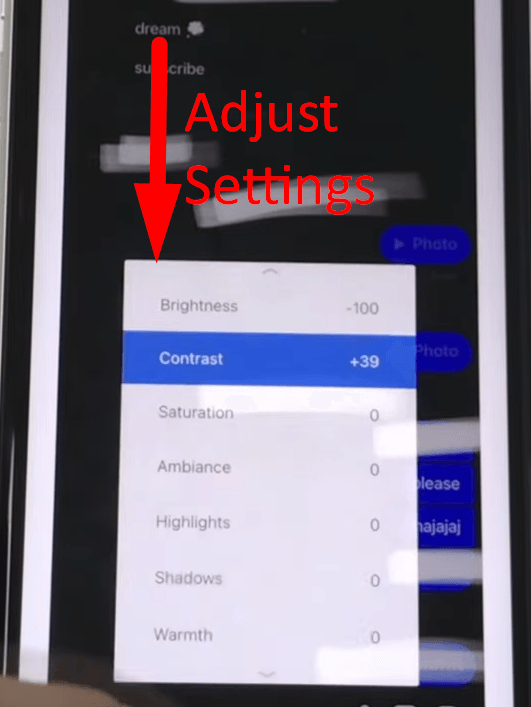
Step 3- Set the Adjustments
- Based on the requirement, you can carefully enhance the impact of these adjustments by bumping up the intensity of each setting.
- However, follow these adjustments to remove the white marker:
Brilliance = set to 100
Shadows = set to -100
Brightness = set to -100
Sharpness = set to 100
These adjustments will reduce the opacity of the white marker and enable you to view the images. On the other hand, make the following adjustments in addition to the ones listed above if they do not work:
Exposure = set to 100
Highlights = set to 100
Contrast = set to -100
Step 4- Zooming in to View

After the adjustment, click the “Yes” icon and zoom in to the white marker area; although it will not be removed, you can see what’s underneath it.
Note: The adjustment intensity may vary depending on the highlighter layers and background color. Moreover, the brightness must be adjusted according to the intensity of the color to see through perfectly. However, you must go lower or higher from the settings to check which settings enable you to see the image.
Third-party Applications
While the iPhone has a built-in feature to reveal hidden texts with simple setting adjustments, it does not have sufficient security. Therefore, third-party applications such as Snapseed and Image Scrubber offer more advanced methods to obscure data with professional tools. These apps are helpful since they have improved adjusting options that eliminate complex white markings.
Step 1- Install the Application
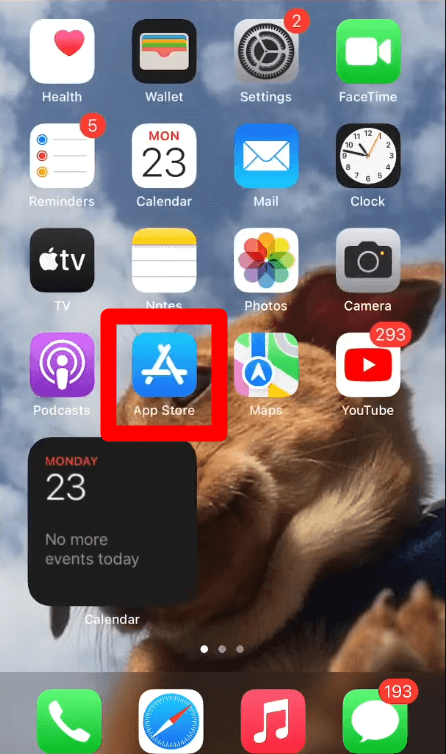
- Go to the “App Store” on your iPhone and click the search bar on the top of the screen.
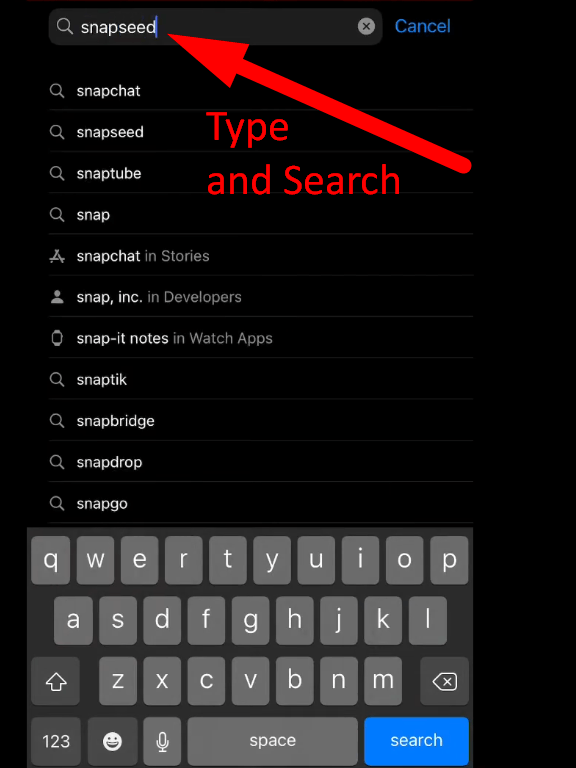
- Type “Snapseed” and tap the search button
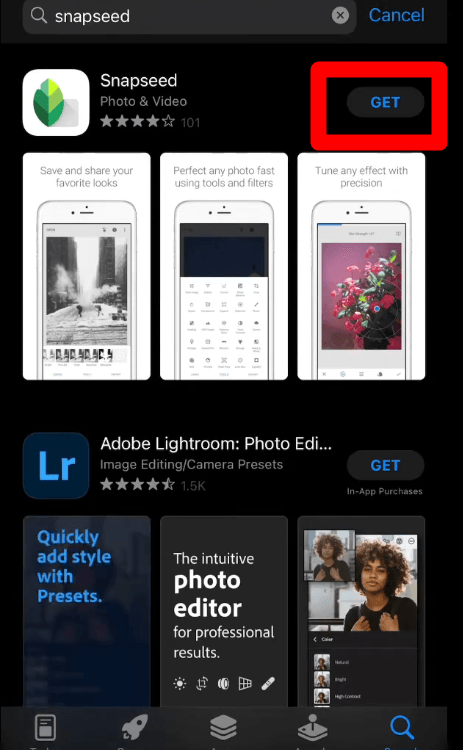
- Select the Snapseed app and click the “Get” button to download it. It will start installing itself on your device as soon as it’s downloaded.
Step 2- Pick a screenshot or photo
- First, taking a screenshot of the image with the white marker is necessary.
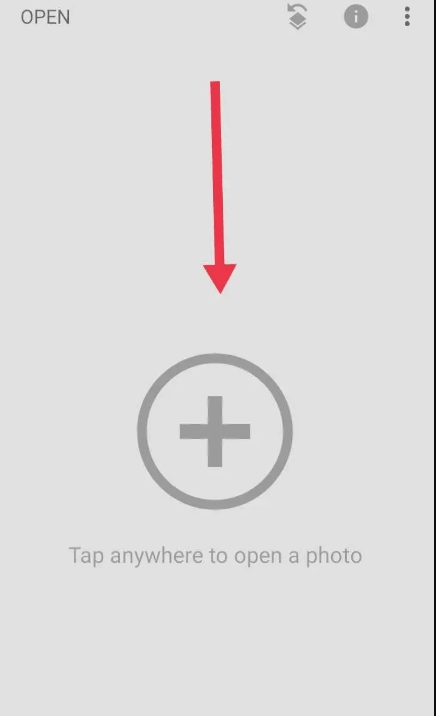
- Find the application and open it from the home screen.
- Click the “Plus” icon or anywhere on the screen, and select the image or screenshot to add it to the app.
Step 3- Edit the Image

- Next, choose “Tune Image” from the popup menu by clicking “Tools” on the bottom menu bar.
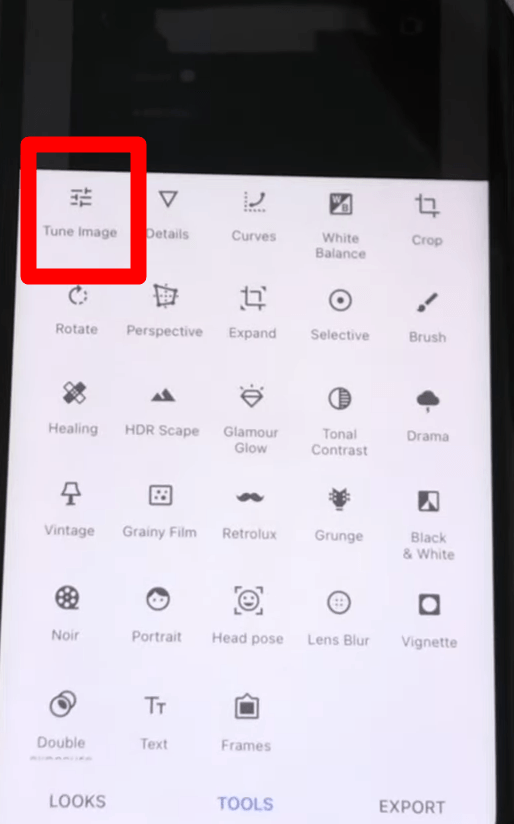
- If using a different photo editor, you can select this feature from the image settings.
Step 4- Setting Adjustment
- Click the “Settings” button at the bottom of the screen after selecting the Tune Image.
- Then, from the popup menu, select and adjust the intensity of the individual settings like “saturation, brightness, contrast, and warmth.”

- After making the change, you can zoom in and see through the white marker on the iPhone by clicking the “yes” symbol in the lower right corner of the screen.
Note: The setting adjustments are not the same for images with a white marker, which is why it is necessary to adjust the intensity to work for you. Moreover, text color and background also play crucial roles, and these apps allow you to change the background to see through the marked area.
How to Effectively Hide the Information on your iPhone?
The markup feature is the easiest way to edit and hide crucial information from images or documents. Therefore, take the following steps to ensure that no one views your photo that contains critical information:
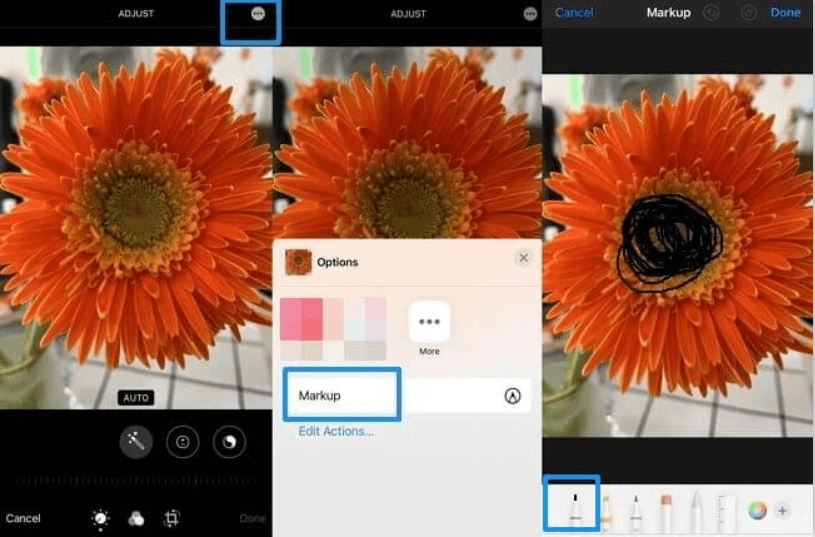
- Select the picture from the “Photos” app or open the Mail or Files app and click to open the desired document.
- Then click the “edit” button and tap the horizontal “three-dot” icon from the top right.
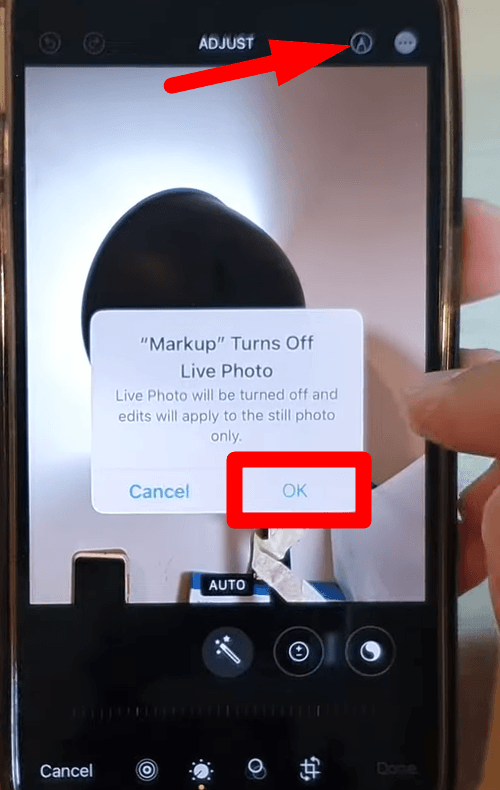
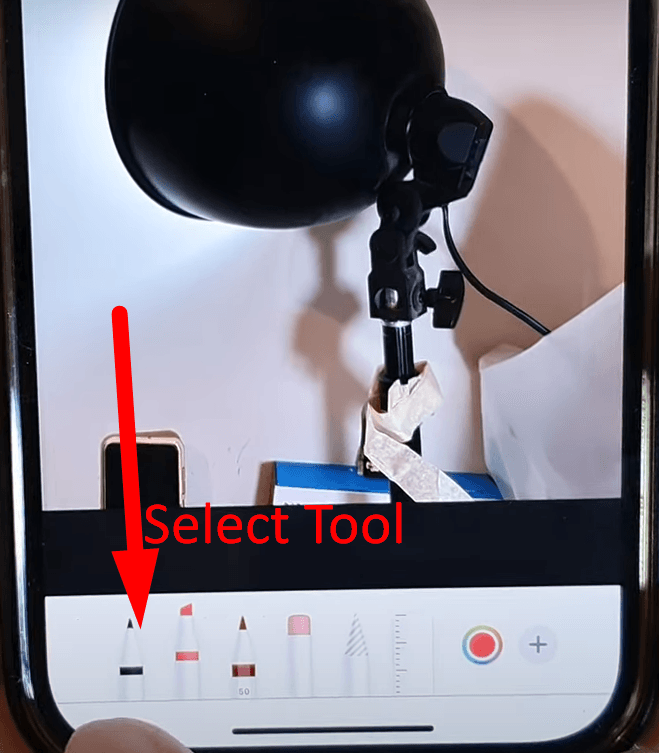
- Select the “Markup” option and select the color of “marker.”
- Draw over the information a few times until you can’t see what’s there. Sometimes, you must apply different layers to protect your image or file.
However, to further secure your data, follow these tips for applying white or other color markers efficiently.
Using the Pen function instead of highlighter
The Pen tool is the perfect marker when set at 100% opacity, and a single layer is enough to hide texts from image editing tools. However, for better results, it’s necessary to cover the information more than one time to avoid it from revealing. Besides this, a Pencil tool is also an option, but it acts like a highlighter because you need several layers to obfuscate something efficiently.
Note: Various third-party tools with advanced features can reveal the information hidden by Pen Toll.
Utilize the Shape Tools
Shape Tool provides a strong layer of protection when you have to hide sensitive data from revealing by applications. To utilize this feature, stick to the following instructions:

- From the Markup window, click the “Plus” sign from the bottom right of the drawing tool option.
- Then, drag the preferred shapes to the text or image you want to hide.
- Now, click the “icon” at the bottom right corner to see more options for filling the highlighted area. You can use any color, so one layer of this tool will be enough to hide the required text on the image.
Note: Choosing the color according to the background is necessary, like choosing a white marker if the background is light. With this, the iPhone’s built-in features or applications cannot reveal the information hidden behind the marker.
Apply more Highlighting Layers.
The highlighter is more efficient in hiding than the Pen tool, but you must add more layers when applying this. Moreover, using more than five marker layers is recommended to overwrite the image colors and prevent others from seeing through the marker.
Therefore, lift your finger off the screen before adding another layer of the highlighter rather than swiping to add extra layers. It will make the highlighter thicker and provide better protection, making it challenging to reveal information with simple editing tools.
Use Third-party or iOS Built-in Obfuscation Feature.
Third-party applications like Image Scrubber provide professional markup tools to hide text and use markers and highlighters. One significant advantage of Image Scrubber is its privacy protection, which ensures the information stays hidden. Moreover, it enables you to remove the location metadata from the photo so that people cannot trace it back to you.
Moreover, Everest Pipkin is another prominent web tool offering you to pixelate or blur faces when sharing photos. Therefore, these apps provide advanced security that iPhone built-in features cannot offer.
Use Mosaic
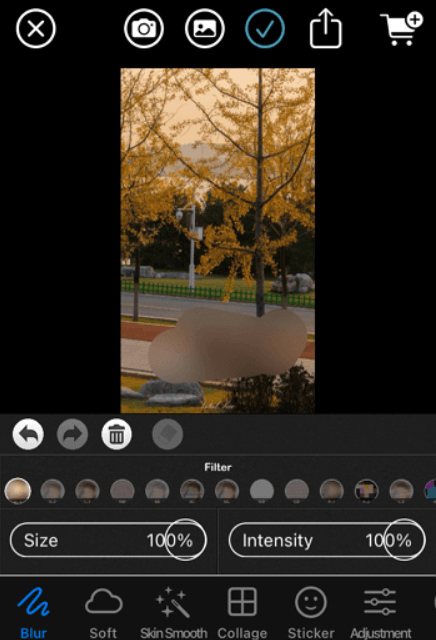
The mosaic feature can be applied from third-party applications that can efficiently use your image and prevent people from using it. Many prominent apps exist, but the “Blur App” offers advanced features and is compatible with the latest iOS version.
After selecting the image in the app, move your finger to apply the pixelated mosaic. It will allow you to adjust the size and strength or add more blur effect filters when editing the image.
Importance of Protecting Sensitive Information with iPhone Markup Feature
The markup feature is an excellent tool for editing screenshots and images and hiding sensitive information like passwords or addresses. Therefore, there are several reasons for protecting such data, where digital privacy is a primary concern.
Prevent Accidental Data Exposure.
Many iPhone users rely on the markup tool to efficiently hide sensitive information before sharing it on social media platforms. However, if the tool isn’t used adequately or if you use only a single layer, the simple editing adjustments will reveal the hidden data. Therefore, using more than one white marker layer is necessary to prevent privacy risks.
Common Markup Tools May Not Be Secure Enough
Sometimes, iPhones’ light-colored or white markers provide a false sense of security because they only overlay the information. So, hidden data will be restored by increasing the brightness or changing the contrast. Therefore, using advanced tools like the pen tool or adding more highlighter layers is crucial before sharing the photos.
Safeguarding Against Identity Theft
Personal information like emails, phone numbers, or addresses can lead to identity theft. Moreover, other individuals can easily retrieve this data from inaccurately hidden photos. Consequently, to ensure the data stays obscured even with advanced editing tools, it is necessary to use the markup tool effectively, such as by setting the opacity to the highest.
Third-party Alternatives
Third-party apps like Image Scrubber offer more protection with advanced features like blurring or pixelating. Therefore, it prevents data recovery from simple editing settings on iPhones or other tools. These tools are designed to protect the data and are a perfect alternative to iPhone’s built-in feature.
Conclusion
With a few easy modifications to the contrast, brightness, and exposure, the built-in feature of the iPhone allows you to see through the white marker. Therefore, using more secure options like pen tools is necessary to protect personal data. Besides this, third-party applications such as Image Scrubber ensure the permanent hiding of sensitive details. Thus, this guide has offered the best methods to uncover the hidden data and how to apply the markup feature to protect your privacy effectively.
FAQs
Is it possible to see through the Black Marker on an iPhone?
Black markers are more challenging to see on an iPhone than white ones. However, if the opacity is lower, it’s possible to reveal the hidden information by adjusting brightness and contrast settings.
What is the best tool to completely hide text on my iPhone?
The Pen tool in the markup feature on your iPhone is efficient because it provides advanced and thorough coverage. However, it’s necessary to use different marker layers to ensure the hidden data cannot be revealed with adjustments.
Is it legal or ethical to reveal hidden information in images?
Discovering hidden, personal, or sensitive information can raise legal and ethical concerns without consent. For example, US data protection rules prohibit accessing and releasing personal information from images and may have legal consequences. Moreover, revealing hidden information without the owner’s permission is a privacy infringement.
Why is the Markup feature not working on my iPhone?
There could be a few different reasons why the markup functionality on your iPhone isn’t functioning:
- Outdated iOS version
- Software bugs or glitches
- Storage Issues
- App-specific issues
- Privacy restriction settings
To solve this issue, restart your iPhone, check for iOS updates, and try to free up some storage. However, if these solutions do not work, a factory reset or contacting Apple Support will solve the problem.