


Welcome to the realm of Kdenlive, where your creative visions come to life. You’ve meticulously crafted your masterpiece using Kdenlive’s arsenal of editing tools, and now it’s time to share your artistry with the world. In this blog post, we’ll unlock the secrets of seamless video exporting in Kdenlive, empowering you to showcase your work in all its glory.
From preserving visual brilliance to optimizing formats, we’ll guide you through the process step by step. So, prepare to embark on a journey of exporting excellence, and let your creativity shine with Kdenlive!

Table of Contents
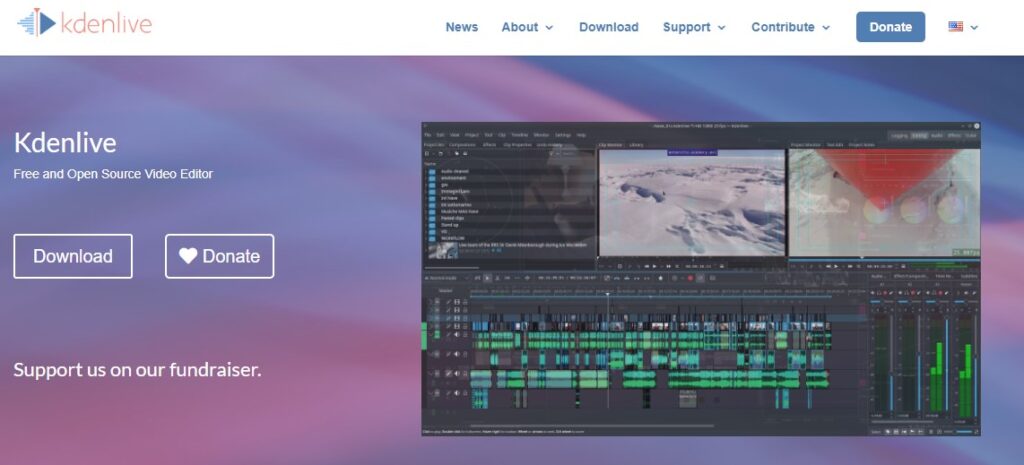
What is Kdenlive?
Kdenlive is a versatile open-source video editing software suitable for users of all levels. With its user-friendly interface and extensive functionality, it allows you to trim, cut, add effects, adjust audio levels, and more. Supporting various formats and offering advanced features like multi-track editing, Kdenlive is a popular choice for content creators and filmmakers. Whether you’re working on a simple home video or a complex professional project, Kdenlive empowers you to bring your creative ideas to life.
How to export all videos in kdenlive?
To export your videos in Kdenlive, follow these step-by-step instructions:
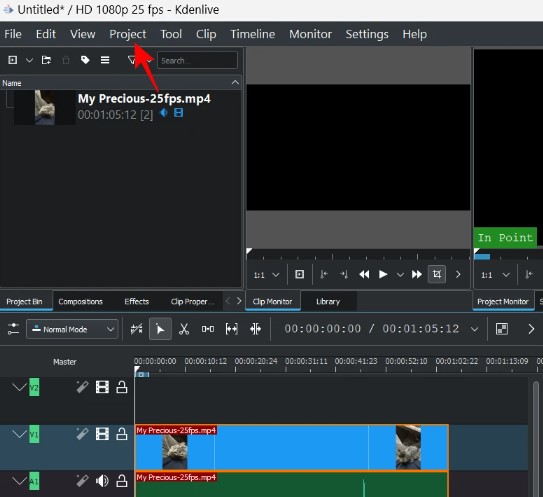
- Start by ensuring that you have imported your video footage and made all the necessary cuts and adjustments within your project.
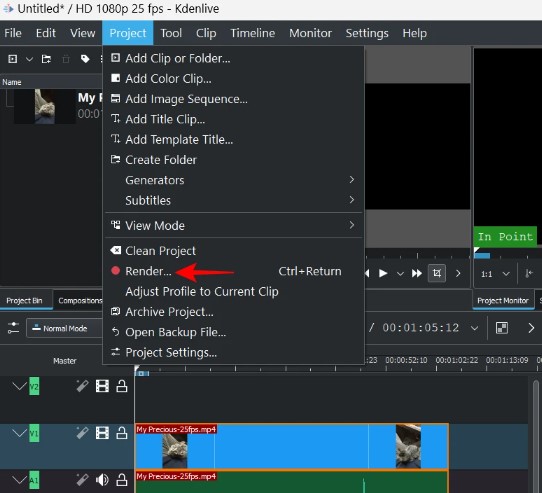
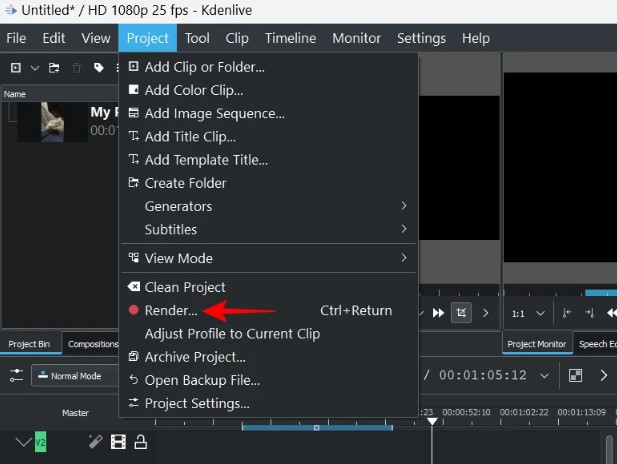
- Once you’re satisfied with the editing, navigate to the toolbar above and click on “Project.”
- In the dropdown menu, select “Render.” Alternatively, you can use the keyboard shortcut Ctrl+Enter, as indicated next to the option itself.
- This will open the “Rendering” window, which provides various options for exporting your video.
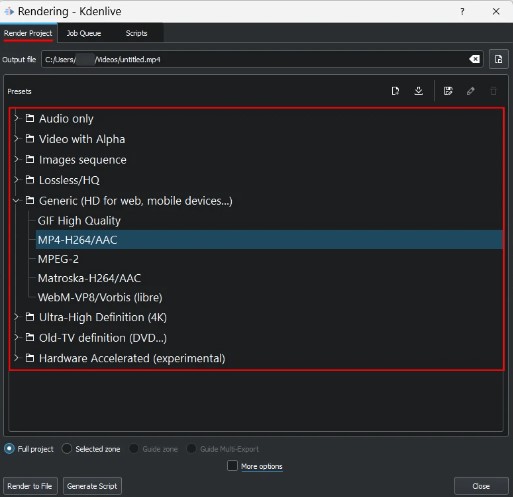
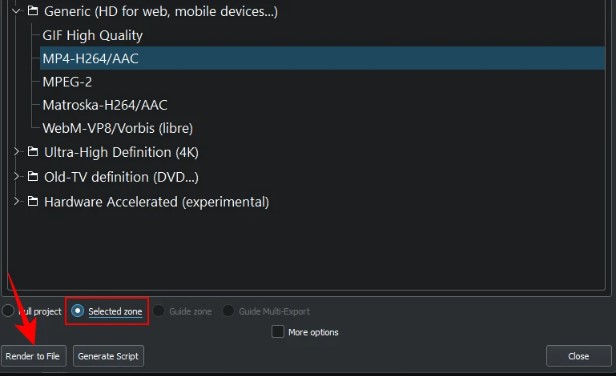
- Within the “Rendering” window, make sure you’re in the “Render Project” tab, where you can find a range of format presets to choose from. For a standard export, the default MP4 preset should suffice. However, you can explore other format options based on your specific requirements.
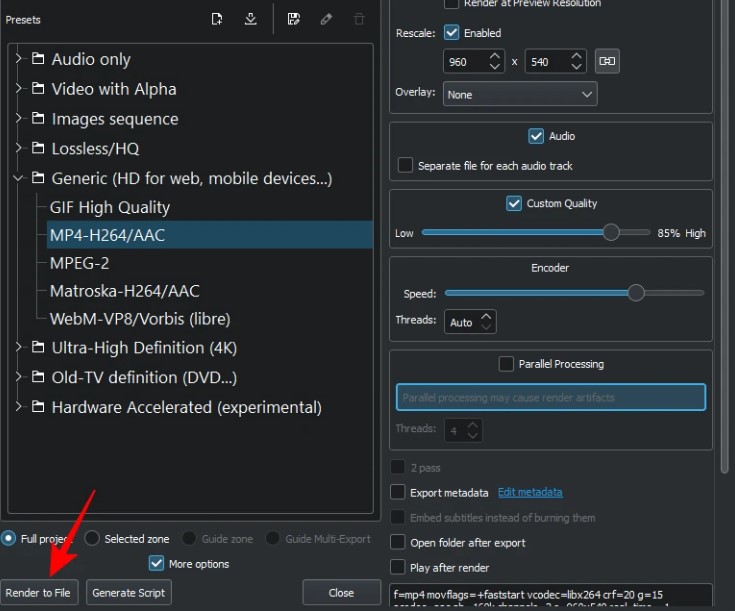
- Confirm that “Full project” is selected to ensure that the entire edited project will be included in the exported video.
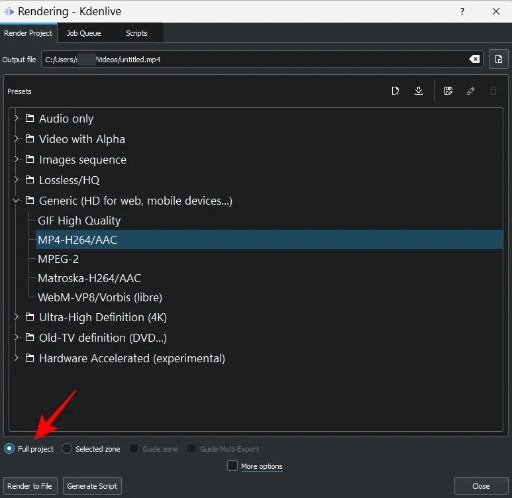
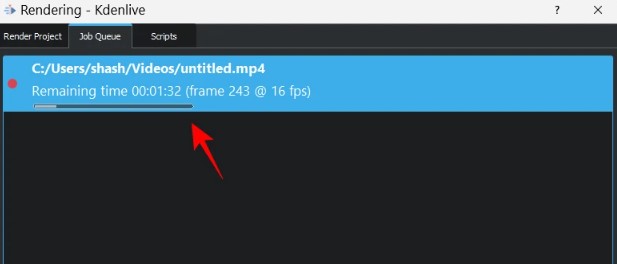
- Now, click on the “Render to File” button. This will initiate the video export process.

- Allow Kdenlive some time to complete the export. The duration may vary based on the length and complexity of your project.
- Once the export process is finished, your video will be available at the default save location. Kdenlive usually saves the exported file in your designated project folder or the location you specified during the export.
How to export part of a video in Kdenlive?
If you only want to export a specific portion of your video in Kdenlive, follow these step-by-step instructions:
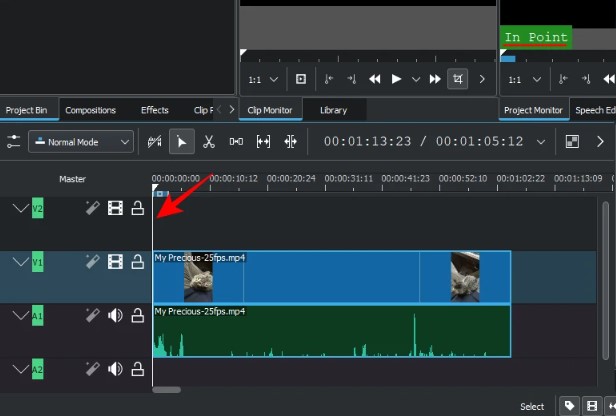
- To begin, mark the in and out points of the desired section. Position the timeline marker to the starting point of the video segment you wish to export.
- Press the letter “i” on your keyboard to mark the video in point. This will indicate the beginning of the selected zone.
- Next, move the timeline marker to the ending point of the video segment.
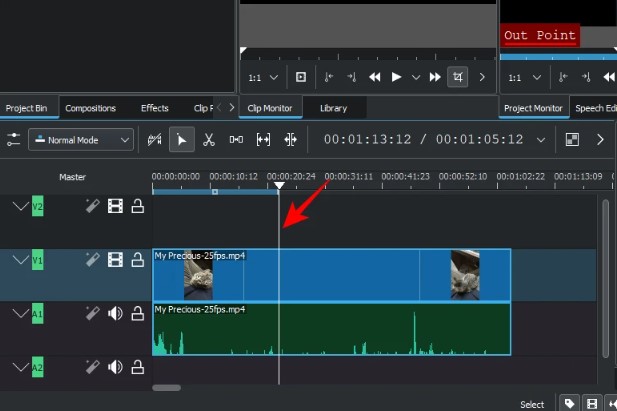
- Press the letter “o” on your keyboard to mark the video out point. The selected zone will be highlighted in blue within the timestamp area, indicating the range you have chosen.

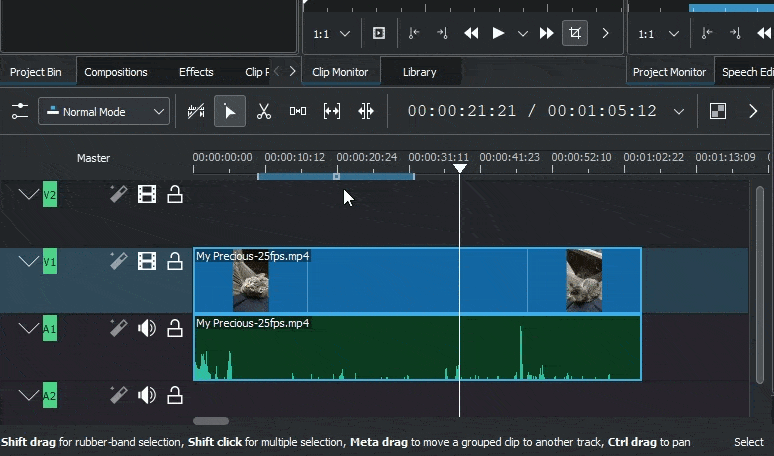
- If necessary, you can adjust the selected zone by dragging its center to a different position or dragging the edges to change its length. This allows you to fine-tune the specific portion you want to export.
- Once you are satisfied with the selected zone, navigate to the toolbar and click on “Project.”
- In the dropdown menu, select “Render.” This will open the “Rendering” window.
- Within the “Rendering” window, ensure that the “Selected zone” option is selected at the bottom. This ensures that only the marked section will be exported.
- Finally, click on the “Render to File” button to initiate the export process for the selected zone.
Bonus Tips: Change Render/Export options
When it comes to exporting videos in Kdenlive, the “Rendering” window provides several options that allow you to customize the export settings according to your preferences. Here are a few key options worth noting:
- Change Export Location and Filename
To change the export location and filename in Kdenlive, follow these steps:
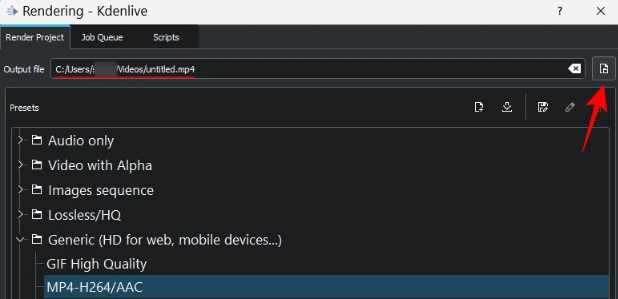
- In the “Render Project” tab of the “Rendering” window, locate the first field that displays the default export location. By default, it is set to:
- C:/Users/(username)/Videos
- To change the export location, click on the button located next to the field. This will open a file browser window.
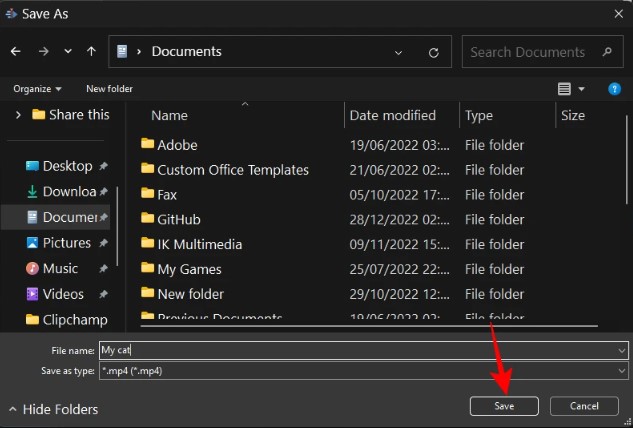
- In the file browser window, navigate to the desired folder or directory where you want to save the exported video.
- Once you have selected the desired location, enter the desired “File name” for the exported video. You can give it a unique and descriptive name to easily identify the file later
- After entering the file name, click on the “Save” button in the file browser window to confirm the new export location and filename.
- Change Format Preset
To change the format preset for exporting videos in Kdenlive, follow these steps:
- In the “Render Project” tab of the “Rendering” window, you will find a list of format presets available for selection.
- By default, the “Generic” category is displayed, and the most commonly used format preset is MP4-H264/AAC.

- If you have a specific format in mind, simply click on the desired format preset to choose it. Kdenlive provides various presets for different formats, including popular ones like MP4, AVI, MKV, and more.
- Clicking on a specific format preset will select it as your chosen export format.
- Export Audio Only
To export only the audio in Kdenlive, follow these steps:
- In the “Render Project” tab of the “Rendering” window, navigate to the format presets and select the “Audio only” format category. This will display options specifically for exporting audio.
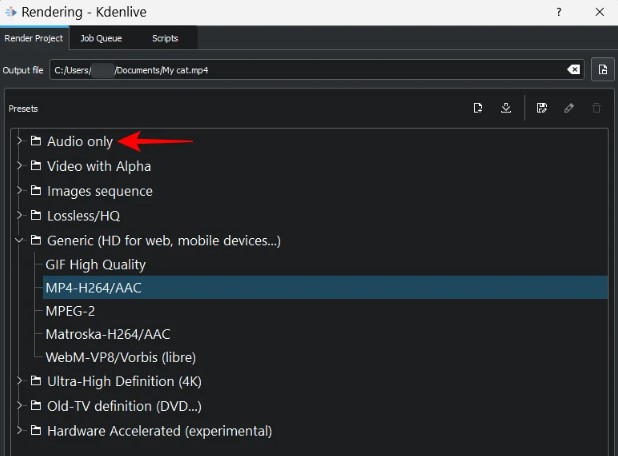
- Once you’ve selected the “Audio only” category, you can choose from the available audio formats. Kdenlive offers formats such as AC3, ALAC, FLAC, MP3, OGG, and WAV. Select the format that suits your needs.
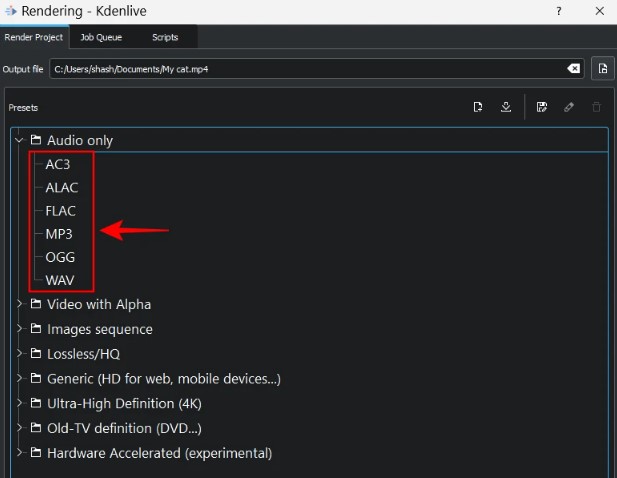
- After choosing the desired audio format, click on the “Render to File” button to initiate the export process.
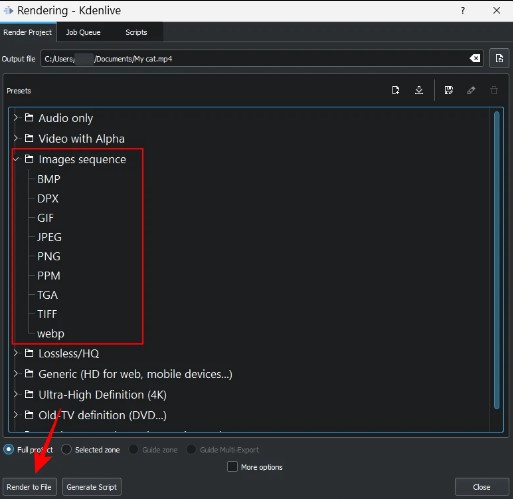
- Export Video as Images Sequence
To export your video as an image sequence in Kdenlive, follow these steps:
- In the “Render Project” tab of the “Rendering” window, locate the “Images sequence” category. Click on it to expand the options specific to exporting as an image sequence.
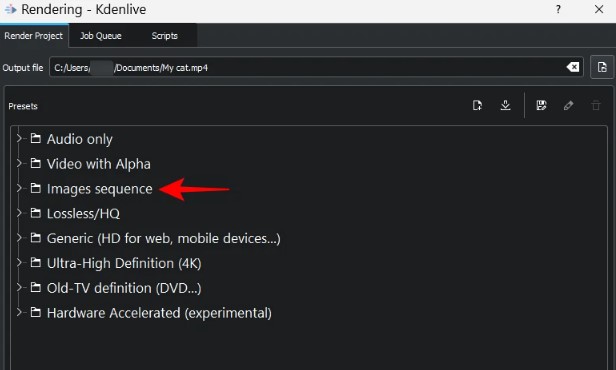
- Once the “Images sequence” category is expanded, you will have the option to select the format of the exported images. Kdenlive provides various image formats such as JPEG, PNG, TIFF, and more. Choose the format that best suits your requirements.
- After selecting the desired image format, click on the “Render to File” button to initiate the export process.
- Change Quality
To change the quality of your output file during the export process in Kdenlive, follow these steps:
- In the “Rendering” window, click on the “More options” button to access additional export settings.
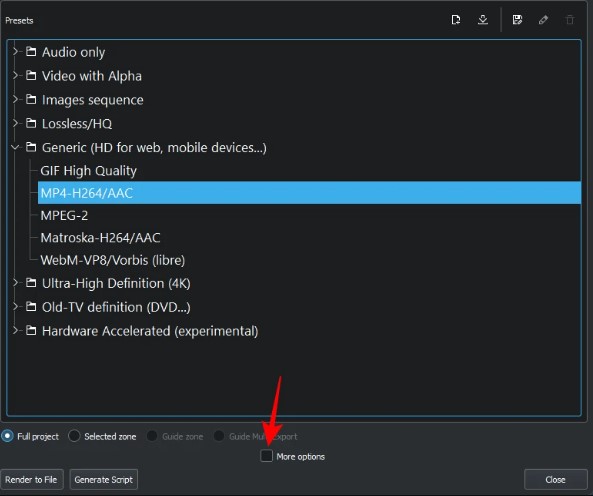
- On the right side of the window, you will find a range of options to customize your output file.
- To change the quality of your output file, click on the “Custom quality” option. This allows you to have more control over the quality settings.
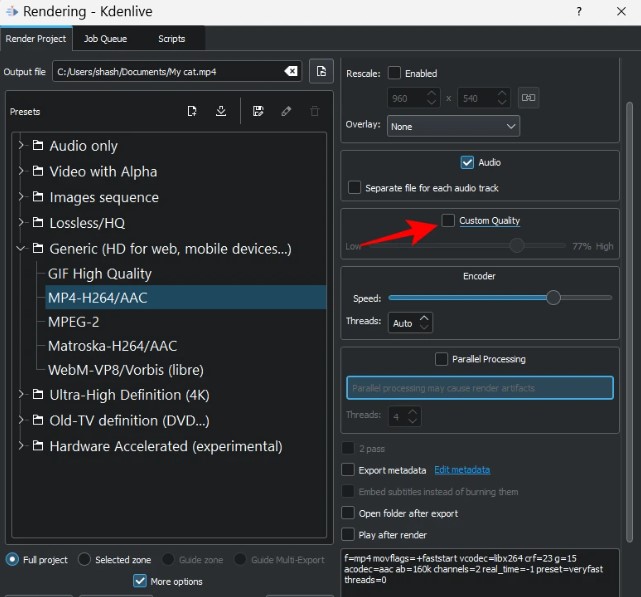
- Once you have selected the “Custom quality” option, you will see a slider that allows you to adjust the quality level. Move the slider to the left for lower quality or to the right for higher quality.
- As you adjust the slider, the quality level will be reflected in real-time, giving you a preview of the output file’s quality.
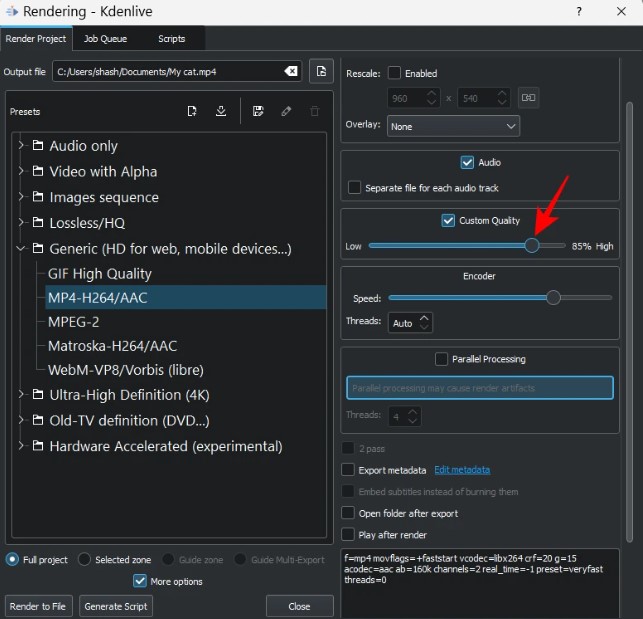
- Find the quality level that meets your preferences or specific requirements for the exported video.
- Export Audio Files Separately
To export audio files separately in Kdenlive, follow these steps:
- In the “Rendering” window, locate the “Separate file for each audio track” option.
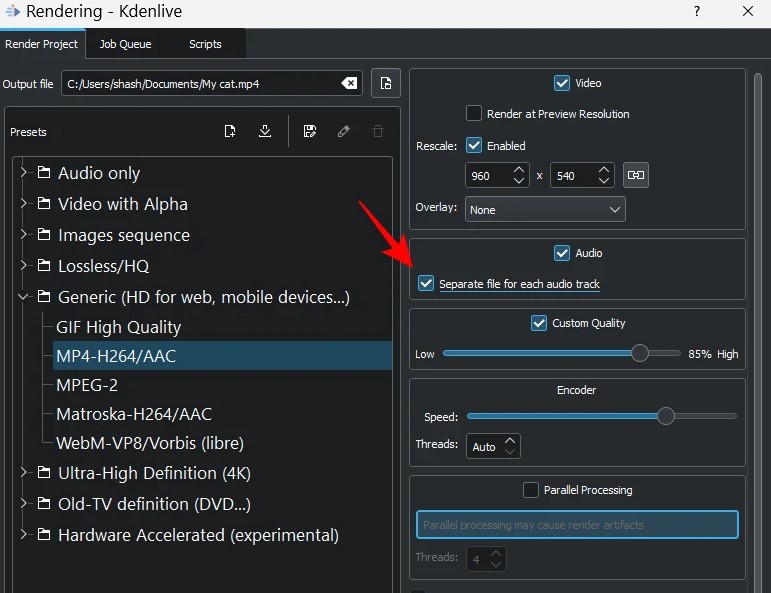
- Check the box next to the “Separate file for each audio track” option to enable this feature.
- By selecting this option, Kdenlive will export each audio track in your project as a separate audio file.
- When you initiate the export process, Kdenlive will generate individual audio files for each audio track present in your project.
This feature is particularly useful when you have multiple audio files within your video and you want to export them separately. By exporting audio tracks as separate files, you can have more flexibility in post-processing or utilize the audio files in different ways, such as mixing or editing them separately.
- Render Video at a Different Resolution
To render your video at a different resolution in Kdenlive, follow these steps:
- In the “Rendering” window, locate the “Rescale” option.
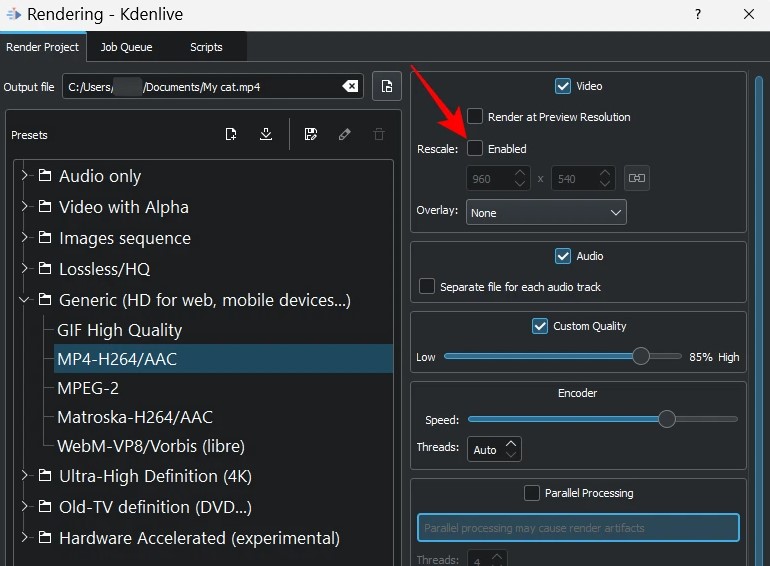
- Next to “Rescale”, select the checkbox labeled “Enabled” to activate the custom resolution feature.
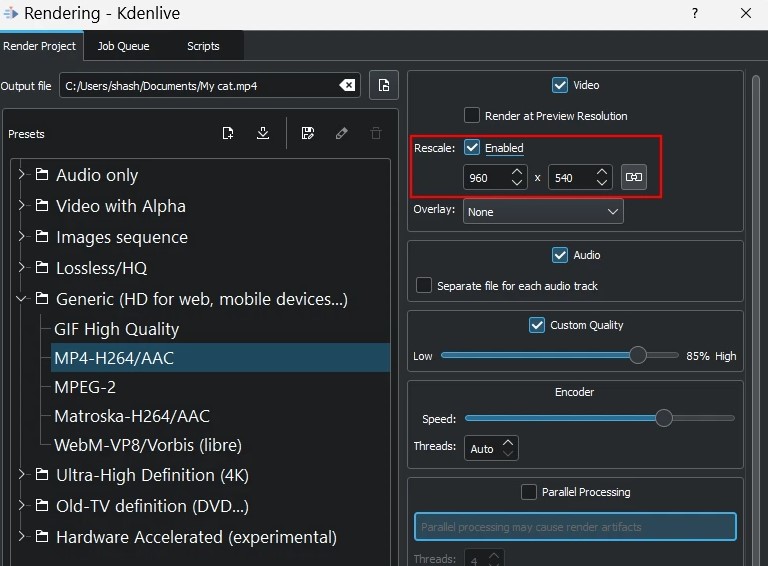
- Enter your desired custom resolution in the designated field. You can specify the resolution in pixels, such as width x height (e.g., 1920×1080 for Full HD).
- Once you have entered the custom resolution, click on the “Render to File” button to start the rendering process.
- Use Hardware Acceleration for Faster Rendering
To utilize hardware acceleration for faster rendering in Kdenlive, follow these steps:
- In the “Rendering” window, navigate to the “Hardware Accelerated” category.
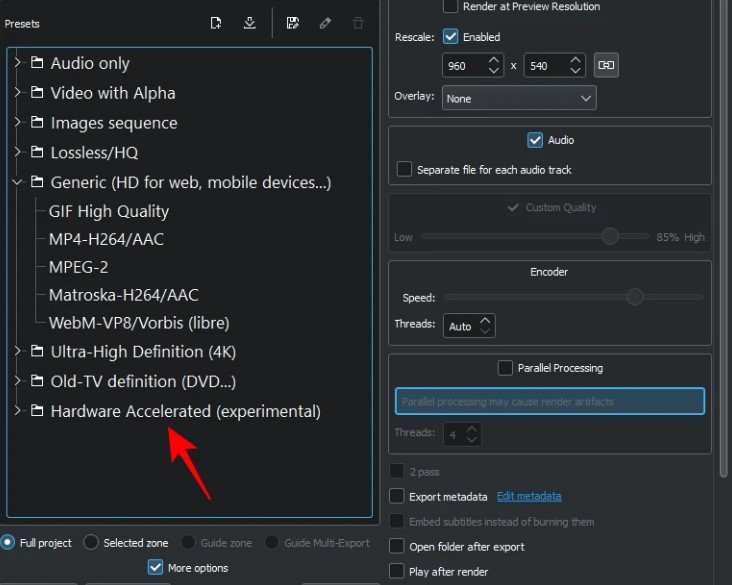
- Click on the “Hardware Accelerated” category to expand the options specific to using hardware acceleration.
- Once expanded, select your desired format preset from the available options. These format presets are optimized for hardware-accelerated rendering.
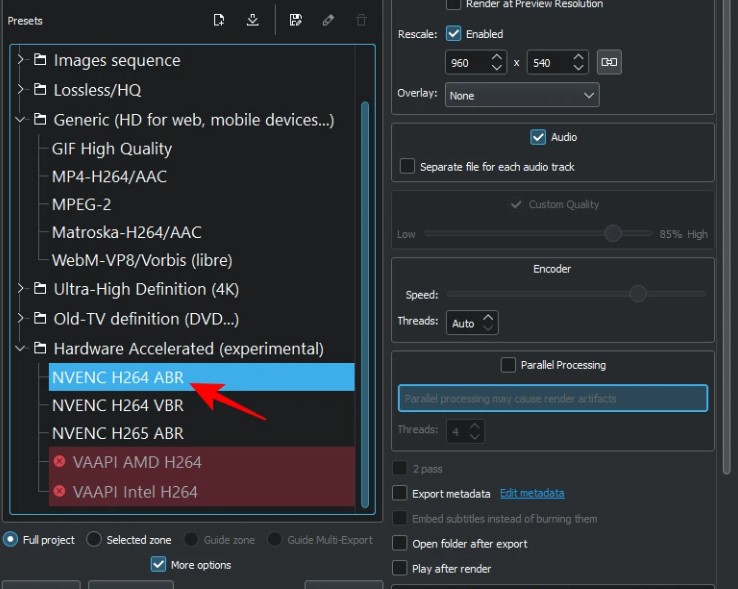
- It’s important to note that hardware acceleration relies on dedicated graphics cards. If your system has an AMD or Intel graphics processor, you can take advantage of hardware acceleration options.
- After selecting your preferred export settings, click on the “Render to File” button to initiate the rendering process.
By following these steps, you can leverage hardware acceleration in Kdenlive to significantly reduce the render time of your videos.
Frequently Asked Questions
How do I export a Kdenlive project?
To export a Kdenlive project, click on “Project” in the toolbar and select “Render.” Choose the desired format and settings, and click “Render to File” to start the export process.
How do I render 1080p in Kdenlive?
To render your video in 1080p resolution in Kdenlive, go to the “Render Project” tab in the “Rendering” window. Select the desired format preset and ensure the resolution is set to 1920×1080 (or 1080p). Then click on “Render to File” to export the video in 1080p.
How do I save my progress on Kdenlive?
Kdenlive automatically saves your project as you work on it. However, it’s recommended to save your progress manually by clicking on the disk icon in the toolbar or using the shortcut Ctrl+S. This ensures that your changes are saved and can be accessed later.
What are the recommended export settings in Kdenlive for YouTube?
For exporting videos to YouTube in Kdenlive, it is recommended to use the MP4 format with H.264 video codec and AAC audio codec. Set the resolution to 1080p or 720p, the frame rate to 30 or 60 frames per second, and the bitrate to a suitable value based on the content.
Can I export videos in Kdenlive to different file formats?
Yes, Kdenlive allows you to export videos to various file formats. In the “Render Project” tab of the “Rendering” window, you can select the desired format preset or customize the export settings to match your preferred file format.
How do I export a specific portion of my video in Kdenlive?
To export a specific portion of your video in Kdenlive, use the timeline to mark the in and out points of the desired section. Then go to “Project” and select “Render.” In the “Rendering” window, choose the format and settings, and click on “Render to File” to export only the selected portion.
Is it possible to export audio only in Kdenlive?
Yes, Kdenlive allows you to export audio-only files. In the “Render Project” tab of the “Rendering” window, select the “Audio only” format category. Choose the desired audio format, and click on “Render to File” to export the audio without the video.
How do I change the export location and filename in Kdenlive?
To change the export location and filename in Kdenlive, click on the button next to the export location field in the “Render Project” tab. Navigate to the desired folder, enter the desired filename, and click “Save” to set the new export location and filename.
What is the difference between rendering and exporting in Kdenlive?
In Kdenlive, rendering and exporting are often used interchangeably. They refer to the process of creating the final video output from your project. Rendering involves processing and preparing the video files, while exporting refers to saving the rendered files to a specific format or location.
How can I optimize the video quality during the export process in Kdenlive?
To optimize the video quality during export in Kdenlive, you can adjust the quality settings in the “Rendering” window. Use the “Custom quality” option to control the quality level, often represented by a slider. Moving the slider to the higher end will result in better quality but may increase the file size. Experiment with different settings to achieve the desired balance between quality and file size.


![How to Turn Video into Audio on iPhone [Step by Step]](https://www.hollyland.com/wp-content/uploads/2024/05/how-to-turn-video-into-audio-on-iphone-step-by-step.jpg)