Setting In and Out points is a significant tool for video editing, ensuring a smooth workflow. DaVinci Resolve offers a prominent “In and Out” feature for editing, looping, and exporting the clip. However, sometimes, it becomes necessary to remove the highlighted sections to maintain a smooth process.
So, this guide will enable you to remove In and Out points from single or multiple clips. Follow the process to manage and clear markers seamlessly for an efficient editing workflow.
What are the In and Out points in the DaVinci Resolve?
In DaVinci Resolve, the In and Out points mark the start and end points of a specific segment of the media clip. These points are essential for managing the clips efficiently and ensuring a smooth editing workflow. When importing the raw footage, Resolve precisely analyzes that particular clip segment.
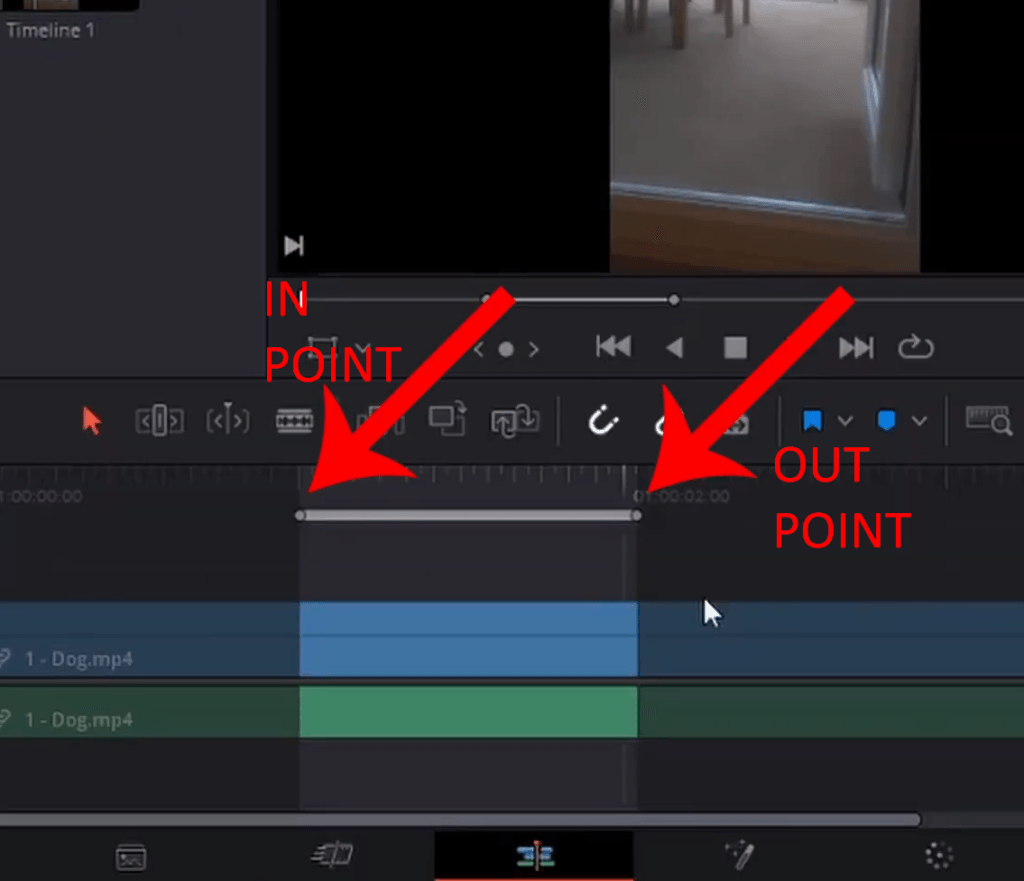
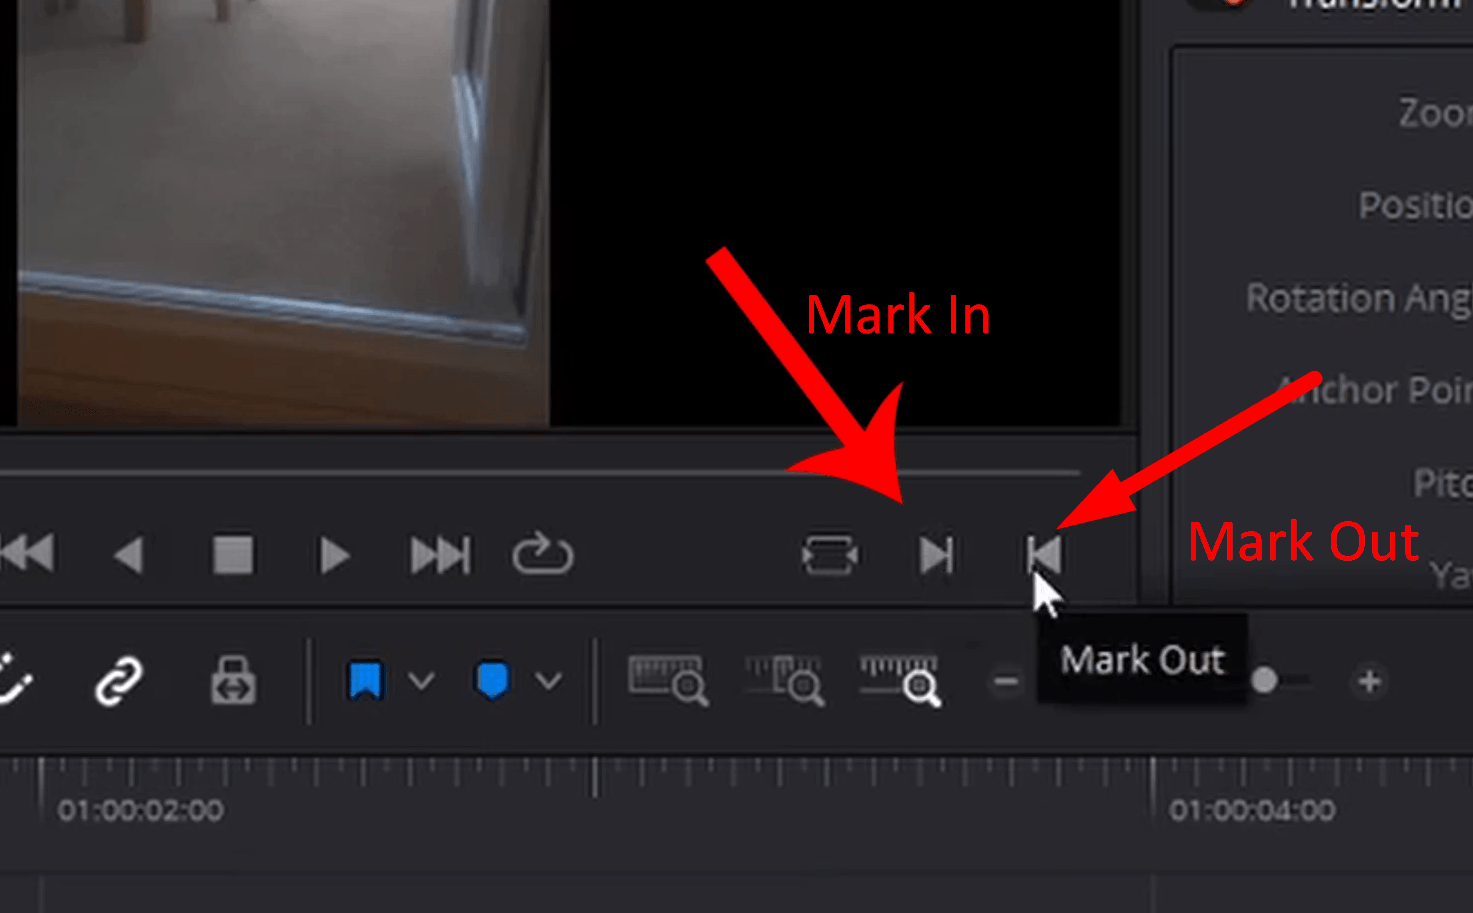
- Mark In Point (I): It defines the first or starting frame of the clip
- Mark Out Point (O): It defines the ending point of the clip
The marked In and Out points are a significant feature in the Resolve used for various purposes:
- Select Segment of the Clip: With In and Out points, you can select a specific segment or multiple segments from the timeline and insert them into another timeline.
- Slip the Clip: The I/O markers are essential in altering the duration of the clip or Slip the clip without affecting the surrounding clips.
- Apply Effects: By adjusting the In and Out points, you can apply effects and transitions without affecting the whole clip in the timeline.
- Remove unwanted sections: The I/O points enable you to select and cut or remove the unwanted section of the clip from the timeline.
- Render or Review: It is essential for exporting specific segments of the clip for rendering or review and allows you to customize the export settings.
- Create a Sub Clip: You can create a “Sub Clip” in the media pool by right-clicking the selected clip. Therefore, breaking down the broader clip into multiple sections is essential.
How to clear In and Out points in DaVinci Resolve?
Clearing In and Out points is essential if you have accidentally selected the shortcut keys and to ensure smooth editing. DaVinci Resolve provides different methods to clear the selected points, whether you use free or studio versions. Here are various methods to remove the In and Out points from the clips.
Import the Clips
- Open the Project
- Launch DaVinci Resolve and ensure you use the updated version for seamless performance.

- Open the existing project or select to create a new project from the bottom right corner and name your project.
- Import the clips
- Go to the “Finder” window from your Mac and browse to the location where your media is stored.
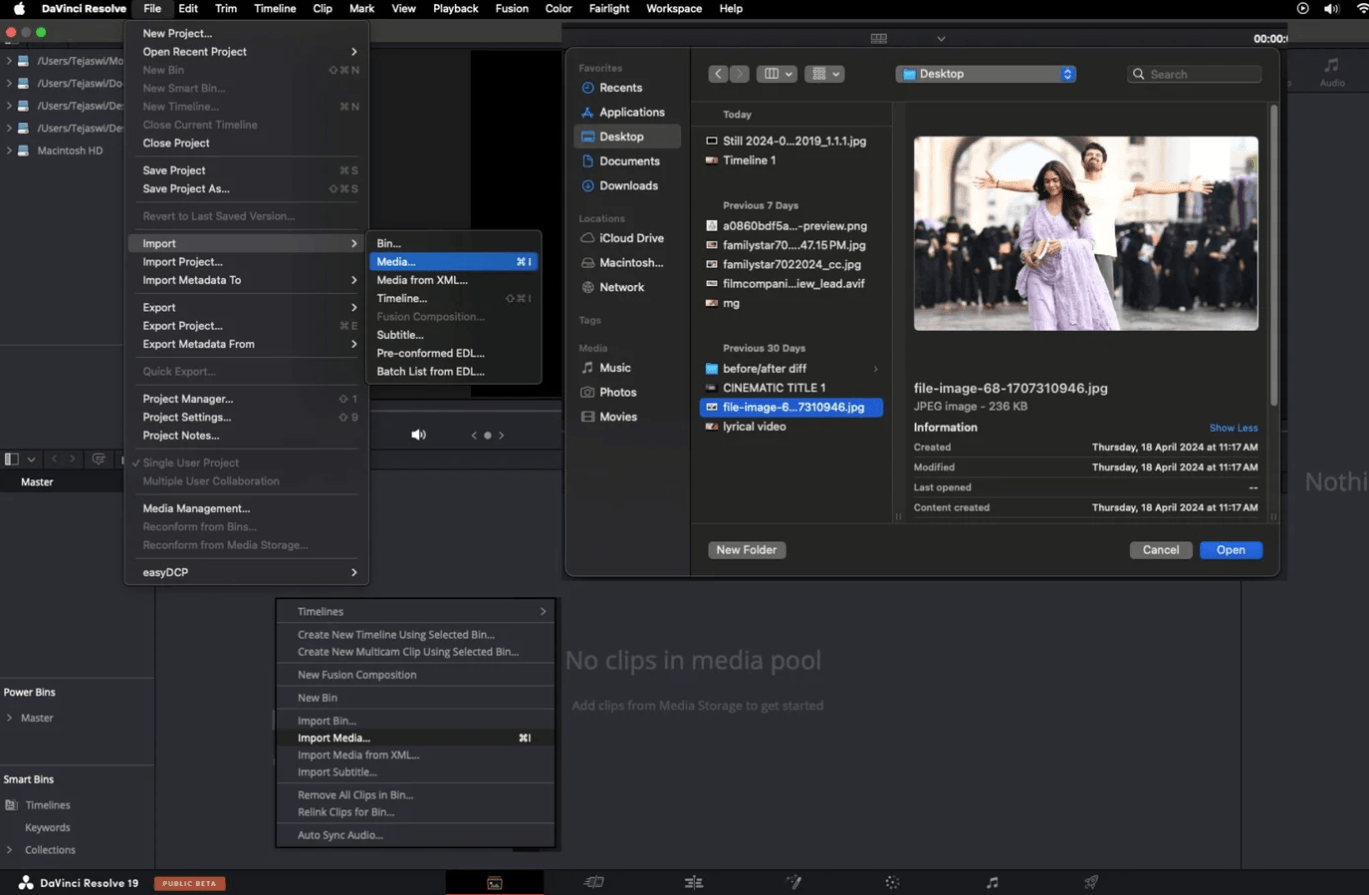
- Select “File” from the top left of the menu bar, hover over “Import,” and then select “Import Media.”
- Alternatively, go to the “Media Storage” panel from the top left and browse the media location.
- Then select the clips, right-click, and choose “Add to Media Pool.”
Note: Ensure that DaVinci Resolve supports the media or will not appear in the Media Storage Panel.
Method 1- Using the keyboard shortcut keys
Shortcut keys are efficient and quick even if you accidentally press the keys or want to remove the In and Out points.
For Windows
- “Alt + I” removes the In Point (audio and video together)
- “Alt + O” removes the Out point (audio and video together)
- “Alt + X” precisely Clear In and Out points (both audio and video)
- “Ctrl + Alt + X” to clear audio from both points
- “Shift + Alt + X” clear video In and Out points
For Mac
- “Option + I” remove In point together with audio and video
- “Option + O” remove Out point (audio and video together)
- “Option + X” Clear In and Out points with both audio and video
- “Cmd + Option + X” clear audio In and Out points
- “Shift + Option + X” clear video In and Out points
Note: After pressing “Ctrl + Alt + X,” if you press Backspace or Delete, the whole audio section will be removed or deleted along with the selected video clip segment. You can also press “Shift + Alt + X,” then “backspace or delete” to delete the video section with the selected audio.
If you use the DaVinci Resolve 18.0 version, press the “G” shortcut key to remove In and Out points from the timeline. It is the easiest and quickest way to clear the markers from your clips without affecting the other clips.
Method 2- Using the Resolve Menu
- From the Edit Page
Step 1- Open the clip in the timeline
- Ensure that the media clip with “In and Out Points” is in the timeline under the “Edit” page.
Step 2- Mark Menu

- Select “Mark” from the top menu bar next to the source viewer panel.
Step 3- Clear In and Out points
Once you are in the mark menu, select:
- “Clear In” to remove the In point
- “Clear Out” to remove the Out point
- “Clear In and Out” to remove both points from the clip
- “Clear Audio In and Out” to remove the audio from both points
- “Clear Video In and Out” to remove the video from both points
- From the Deliver Page

- Once the clips with In and Out points are open in the timeline, go to the “Deliver” page from the bottom menu.
- Clip the drop-down arrow of “Render” and switch to the “Entire Timeline” from “In and Out points.”
- Then, go to the edit page to analyze if the points have been removed.
- Alternatively, use “Alt + X” on Windows or “Option + X” on Mac to remove the In and Out points.
Note: The Render settings ultimately control the exported video by selecting the entire clip or specific segment. So, after changing the settings, go to the “Edit” page to check and ensure the points are removed from the timeline.
- From the Fairlight Page
Clearing the In and Out points from the “Edit” page will clear the markers from the “Fairlight” page. For the Fairlight page, you cannot clear the In and Out points by simply pressing the “Alt + I” or “Alt + O” from Windows or “Option I/O” from Mac. However, pressing the “Alt + X” or “Option + X” on Mac will clear the In and Out points from all over the clip.
Use the Undo Function
- If you accidentally set the In and Out points, using the “Undo” is the quickest and most effective method.
- Press “Cmd + Z” on a Mac or “Ctrl + Z” on Windows and the points will be cleared by reversing the previous action.
- However, this method is only effective if you immediately realize the mistake.
- If you have done editing, like cutting or making adjustments, you cannot perform the “Undo” action.
Export the Clip

- Once you are done editing, go to “File” from the top left menu.
- Choose the video codec, select the desired location to save the file, and press “Export.”
Advanced Export Options
- Export Project

- Go to the “File” from the top left corner and select “Export Project” from the drop-down menu.
- The “Export Project” lets you save the timeline’s media tracks with effects, transitions, and edits. After clearing the In and Out points, you can save or import the file to another project.
- Custom Export
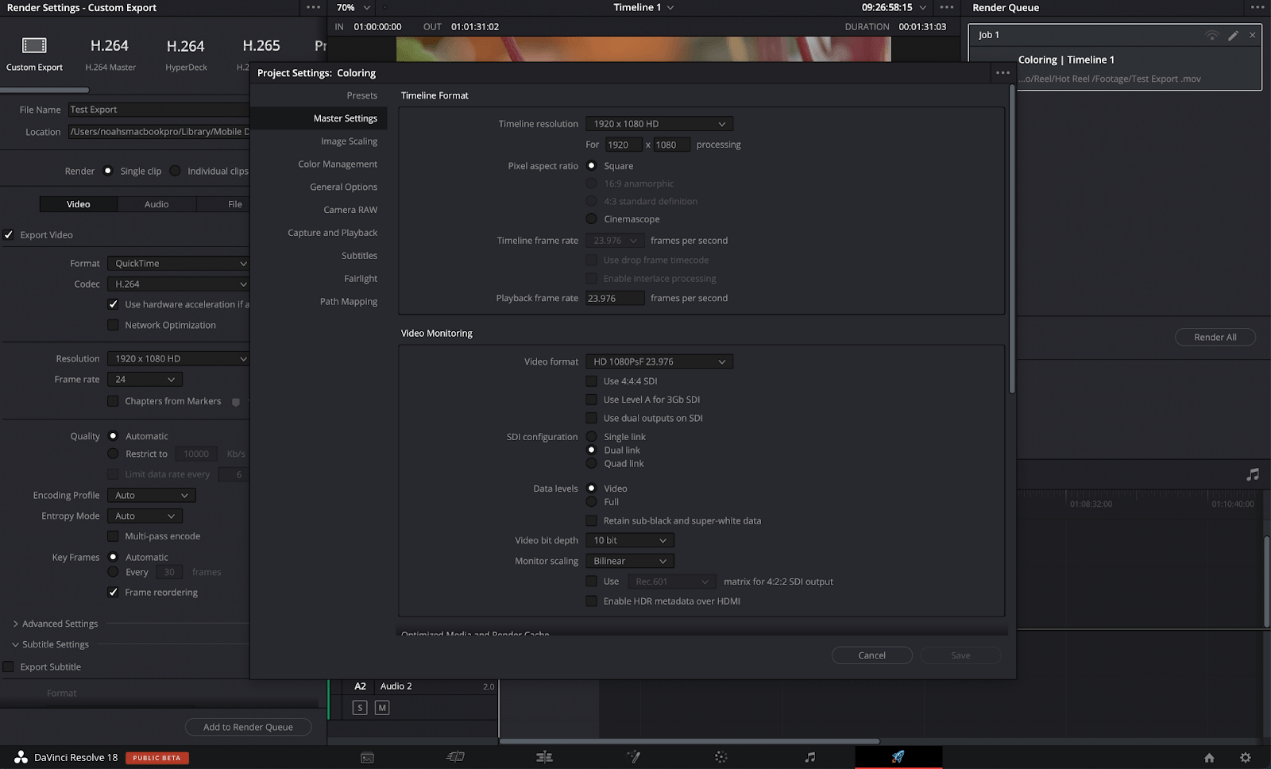
- Go to the “Deliver” page from the bottom menu.
- Choose the “Custom” tab under the “Render Settings” to fine-tune the media.
- Select the appropriate frame and export format of the media.
Bonus Tip: How to add In and Out Points in DaVinci Resolve?
Adding In and Out points is essential to mark the specific segment inside the clip to enhance the editing process. Here is the step-by-step process to add I/O points to the Resolve for smooth and efficient workflow.
Step 1- Add Clips to Media Pool
- After opening the DaVinci Resolve, open the project with your clips or select to import the media.
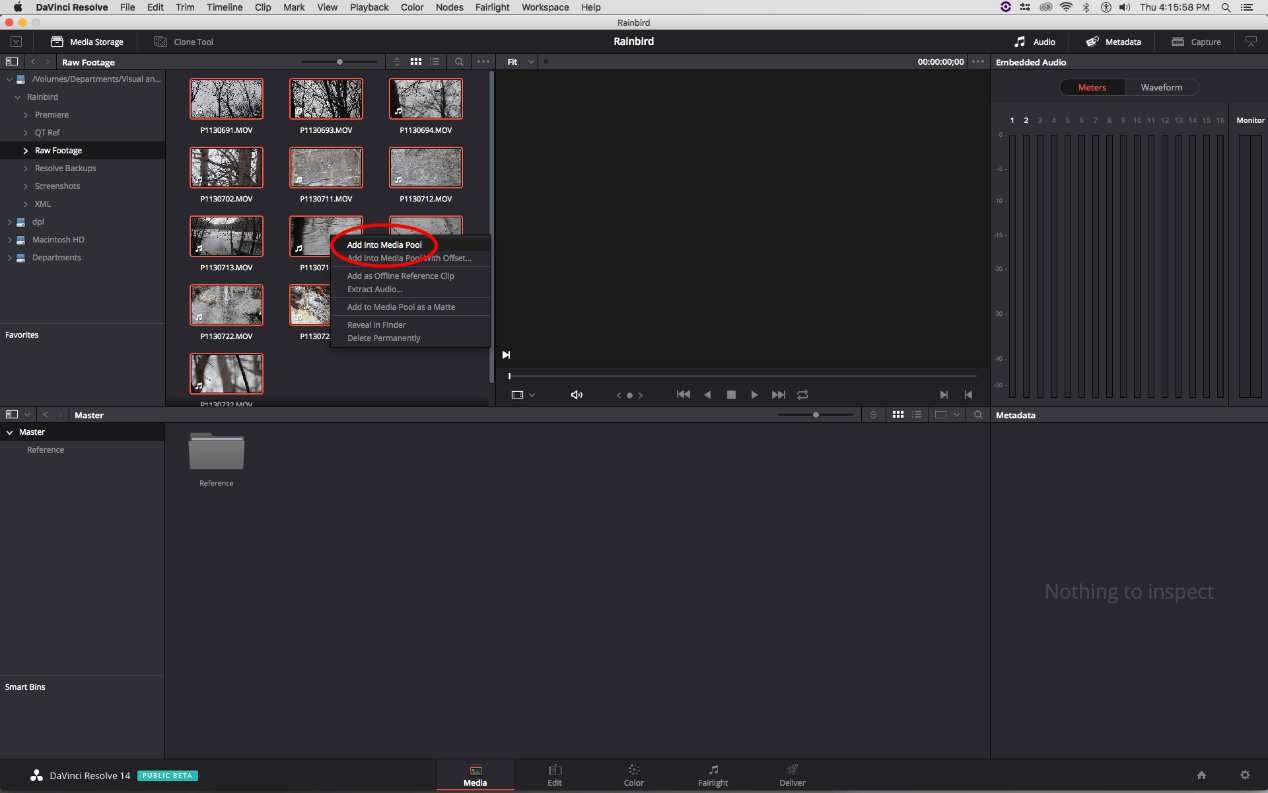
- Navigate to the “Media Storage” window from the top left and select the media files.
- Right-click and choose “Add to Media Pool” or drag the files to the media pool.
Step 2- Open in Source Viewer
- Choose and double-click the source clip in the media pool to open it in the “Source Viewer.”
- Click “Play” or manually drag the playhead to navigate the clip and select the desired frames.
Step 3- Mark In and Out point
- Precisely adjust the playhead and press “I” to add the “In point” on your clip.
- Then move the playhead to the endpoint and press “O” to add “Out point” on the clip.
- Alternatively, after adjusting the playhead, use the “Mark In” button to add “In point.”
- Then, move the playhead to the end frames and press the “Mark Out” from the bottom left of the source viewer window.
Step 4- Adjusting the Playhead
- Click and drag the playhead to either side of the clip to change or adjust the duration of the selected points.
- Once the points are adjusted, you can use the clip to edit and apply effects without affecting the surrounding clips.
Note: Importing the clips in the timeline is best when selecting a specific segment from multiple clips. So, if the clips are in the timeline, follow the same procedure to mark the In and Out points.
Previewing the selected clip
After adding the In and Out points, preview the selected segment by pressing the “Option + Forward Slash” on Mac or “Alt + Forward Slash” on Windows. It will allow the marked clip to play to analyze the points.
Moreover, press the “Shift + I” and “Shift + O” to jump to the in and out points of the clip in the timeline. You can lengthen or shorten the duration by dragging the playhead for precision.
Troubleshooting Common Issues
When working with In and Out points, you may encounter several issues that will disturb the smooth workflow. Understanding the problems and implementing the solutions to add and remove points seamlessly is necessary. Here are the common issues and different ways to troubleshoot them:
- Unable to Clear In and Out points
Sometimes, after clearing In and Out points, these points remain in the media clips. It mainly happens when you have to clear multiple clips in the bins, and the primary reason for this is software glitches or bugs. So, to remove the issue, follow the hereunder steps:
- Ensure you clear the markers using the correct shortcut keys or Menu operations.
- Close the project and restart your operating system to remove the temporary bugs.
- Go to the official website to ensure you use the updated software version.
- For multiple clips, press “Ctrl + A” to select all and then “Alt + X” to clear the In and Out markers.
- In and Out points on the wrong place
After setting, the Out point gets out of frame due to the playhead snapping. Moving the playhead will automatically place it in the first frame of the following clip.
- To capture the exact frames, manually move the playhead one frame back. Then press “O” to set the out point, and it will precisely capture the last visible frame.
- Zooming in on the timeline clips will help place the markers correctly.
- In and Out markers reset in the Deliver Page
It’s expected that when you try to render the select In and Points in the “Deliver” page, these markers will reset. So, to solve this issue:
- Go to the official website to analyze whether you are using the current version of Resolve. Markers reset if there are bugs with an outdated version.
- The Deliver page prioritizes the default settings of “Entire Timeline,” which must be changed to “In/Out Range.”
- Also, change the custom render settings before pressing the “Render” button.
- How to import clips in the timeline without In and Out points?
Sometimes, you cannot move the clips to the timeline with In and Out points. If you select the clips in the “Media Pool” and press “Alt + X” or go to the “Mark” menu, the In and Out points will not clear. Moreover, selecting the “Insert Selected Clips to Timeline with Handles” from the popup menu of clips chosen will not work.
- Create a new project and ensure that you open the “Master Timeline.” Then, it’s necessary to select all the clips, click to copy the files, and then paste them into the newly created timeline.
- The master timeline will disregard the In and Out points. So, copy and paste these files to the older timeline. Ensure that all the clips with I/O points are in the bin to access if you need them.
Conclusion
The In and Out points significantly enhance the smooth and efficient workflow without disturbing the timeline. These points provide greater control over a specific clip segment for effects and transitions. However, this feature sometimes becomes frustrating, and removing these points is necessary. This guide provides various methods allowing you to choose the suitable way to remove the markers from clips.
So, understanding how to add and clear these points is essential to enhance creativity for professional video quality.
Frequently Asked Questions
How to clear in and out in the source window?
To clear the In and Out points from the source viewer window, press “Ctrl/Option + X” to clear both points. Alternatively, go to the “Mark” menu and select “Clear In and Out” to remove the markers. If you cannot clear these points, restart your system and ensure you use the updated version.
What should I do if In and Out points affect the surrounding clips?
Ensure you have precisely adjusted the In and Out points with correct frame placement. Use the source viewer to zoom in on the clip for the perfect setting of these markers. Also, use the “Slip Edit” to shift the “I/O points” one frame backward or forward without affecting the other clips.
How to select clips within In and Out points?
If you have multiple clips in the timeline, selecting all In and Out points within these clips and pasting them to another timeline is impossible. So, after setting the markers, ensure no clip is selected, and press “Ctrl/Cmd + X” to cut and paste them into another timeline.
Can I export a specific timeline part using In and Out points?
In DaVinci Resolve, In and Out points select a specific segment within one or multiple clips. You can export the clips using the “Deliver” page and ensure they render “In/Out Range” before exporting the media.