


Watching photos and movies on a larger projector screen is exciting and improves entertainment. If you have a presentation at school or work, displaying it on a larger screen will make it more engaging. The increased display size from the projector also allows it to cater to a large audience.
You can enjoy several benefits of casting computer displays via a projector. If you have a MacBook, you can connect it to the projector in a few easy steps. You may connect it using an HDMI cable or USB.
You just have to choose an adapter and cable compatible with your MacBook and projector for a seamless display. In this article, we’ll discuss connecting a MacBook to a projector with HDMI.
Steps to Connect MacBook to the Projector
Follow these steps to connect the MacBook to your projector.
Examine Mac’s HDMI Ports and Specifications
Check your MacBook’s ports to see if it has a USB-C or a standard HDMI port. The port will depend on your MacBook version. MacBook Pro and MacBook Air (2008 to 2010 models have Mini DisplayPort. MacBook Pro (2016 or later) and MacBook Air ( 2018 or later) have USB-C.

Get the Right HDMI Cable and Adapter
Gather the right cable and adapter to connect the two devices. You’ll need an HDMI cable if your MacBook has an HDMI port. But if your system has a Mini DisplayPort, you’ll need an adapter to convert to an HDMI signal.

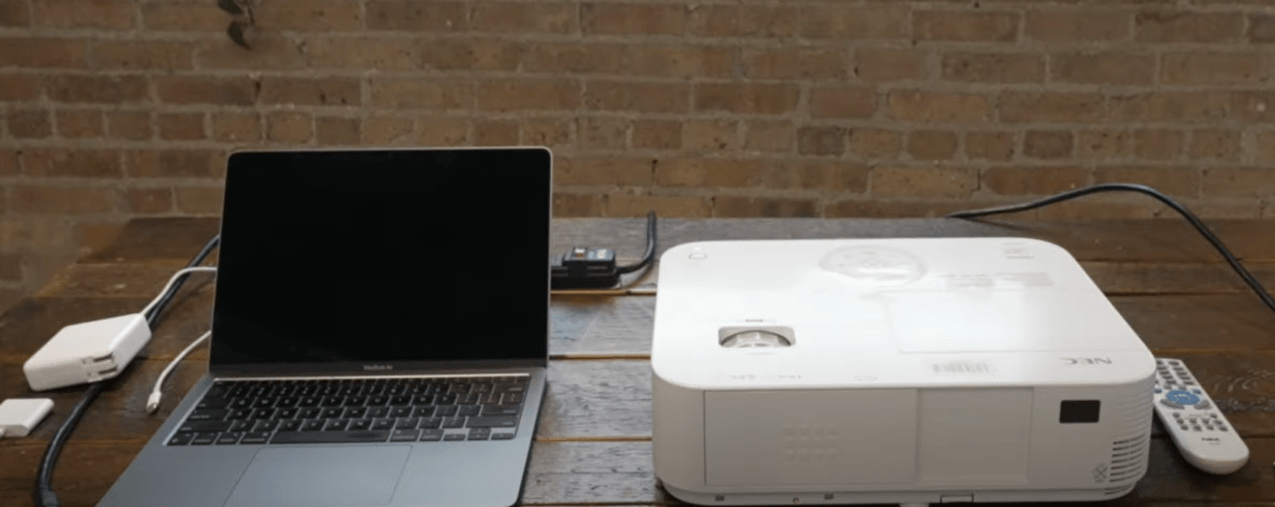
Connect and Turn on the Devices
- Turn off the projector and the MacBook.
- Connect the project to the power supply and insert one end of the HDMI cable into the projector.

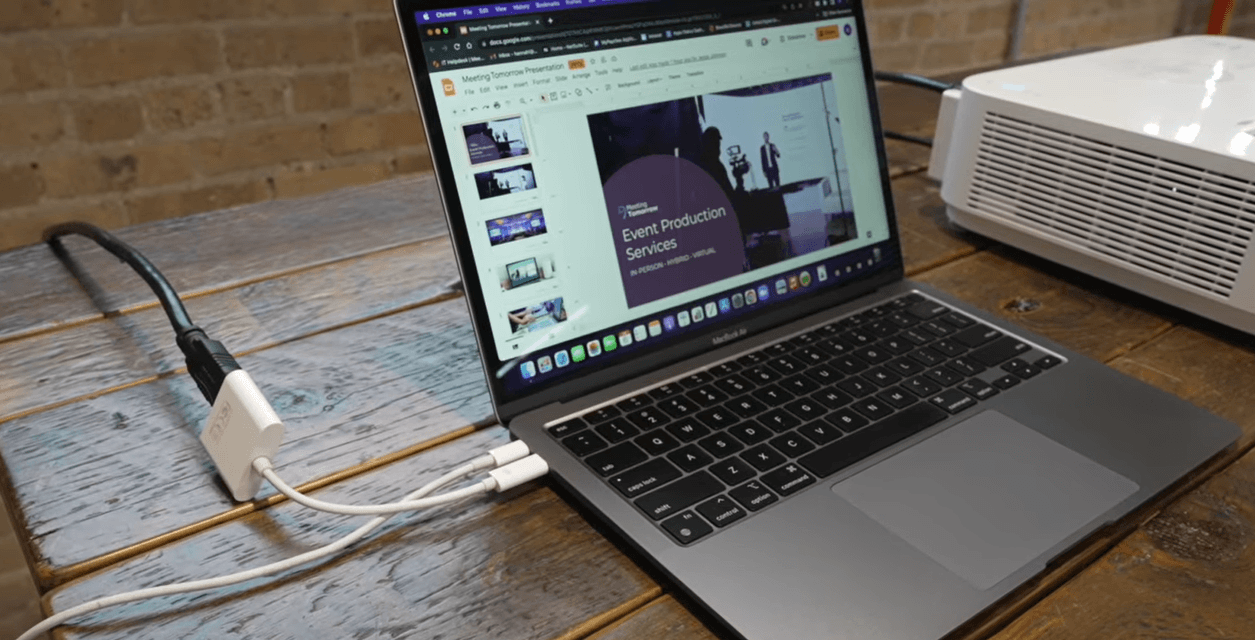
- Connect the HDMI cable to the MacBook port or the adapter.
- Turn on both devices.
Configure MacBook’s Display Settings
- Allow a few minutes for both devices to recognize the connection.
- After a successful connection, you’ll see the laptop screen displayed on the projector.
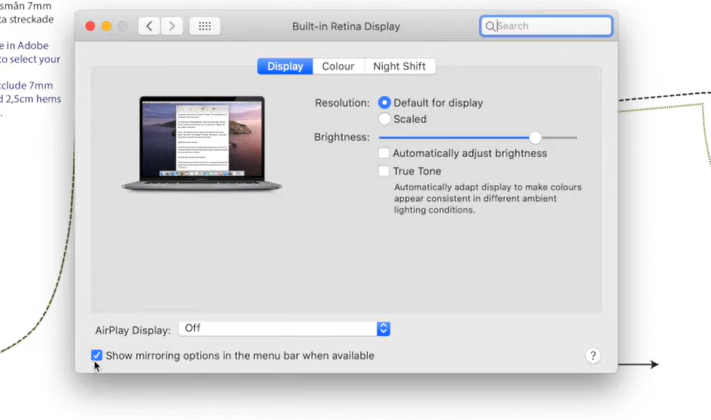
- If the screen is not detected automatically, go to System Preferences and click Displays.
- Choose Arrangement and then select Mirror Displays.
Your laptop and projector are now connected. If you still have trouble connecting, we’ll discuss some common issues and their solutions.
Troubleshooting Common Problems When Connecting the MacBook to the Projector
Find out solutions to some common problems that occur when connecting MacBook to the projector:
- Display problems: Sometimes, the MacBook settings may not allow the projector to display the screen. Here, you can go to System Preferences” on your MacBook and click on “Displays.” Check settings for mirroring and resolution to fit the projector settings. You can press Option/Alt Key and F1 together to see the Display menu. Then select Mirror.
- Incorrect input issues: Wrong input on the projector can cause this problem. Choose the right input source to connect to the MacBook, whether HDMI, USB, or wireless system.
- Right Connection: Ensure the HDMI cable is snugly attached to the ports. The cable should be securely placed without any tugging to ensure both devices have an uninterrupted signal.
- Hardware issues: Check the cables, HDMI ports, and other accessories to ensure there are no hardware malfunctions. If one projector is giving issues, try another one that may be more compatible. Use a different cable if the older one is damaged.
- Device incompatibility: If your laptop and projector are incompatible, there will be no display or audio issues. Check the specifications of both devices and get the right cables.
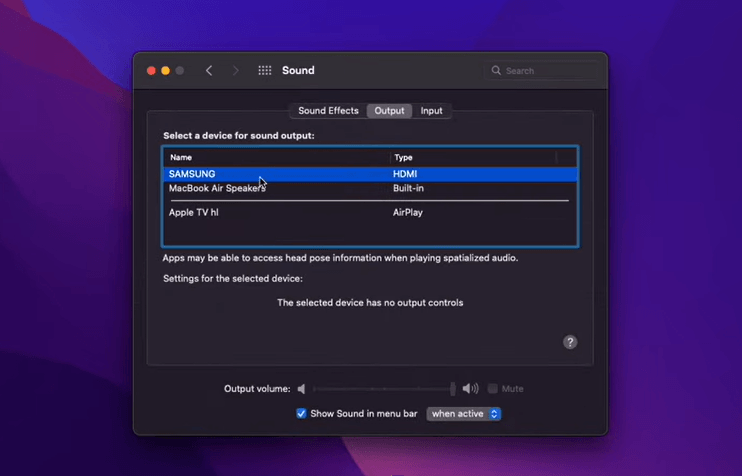
- No audio: If you don’t hear any audio from the projector, check MacBook audio settings. Go to System Preferences, then select Sound Settings. Go to Output and pick the projector as the output device.
- Restarting the systems: If all the connections are secure and the MacBook does not recognize the projector, restart both devices. This will refresh the connections and help in quick configuration. Make sure all the device software is updated to resolve compatibility problems.
- Certified adapter: Always use Apple-certified adapters and cables to connect the devices. This will prevent system issues and long-term damages.
Hopefully, these tips will help you troubleshoot connection issues. You may contact the Apple support team for assistance if all else fails. Connect with the projector manufacturer for system problems.
Is There a Wireless Method to Connect the MacBook to Projector?
Connecting the MacBook wirelessly will offer flexibility; you don’t have to attach cables and wires to the system. However, you’ll need a projector that supports a WiFi connection.
- Check projector compatibility: See that your projector model connects via WiFi. This is the only way to connect the projector and MacBook without cables.
- Form a WiFi connection: Connect the MacBook and projector to the same WiFi connection. Make sure it’s a strong internet connection for a smooth connection.
- Enable AirPlay: Click on the AirPlay icon in the menu on your MacBook. Select Apple TV if you have it already connected to the projector.
- Mirroring and third-party apps: Enable the Mirroring option from the AirPlay menu. If you do not have an Apple TV, use a third-party mirroring app for projectors supporting WiFi connections. You may use apps like AirServer and Reflector. Download and install these apps to form a connection.

- Adjust display: After connecting the devices, adjust the display by changing the projection resolution and aspect ratio.
Conclusion
There, you have all the information on how to connect MacBook to projector with HDMI. Connecting a projector to the MacBook will make the movies, photos, and games more entertaining and impactful. When giving a presentation at work or explaining a school lesson, the above steps will help you connect the MacBook quickly.
Ensure you use a good-quality HDMI cable that is compatible with your MacBook and projector. Check connections and adjust display settings as needed for your system.
FAQs
How do I get my Mac to recognize a projector?
Issues with hardware and software may lead to device incompatibility. If your MacBook doesn’t recognize the projector, go to System Preferences, choose Detect Display, and detect the projector display. Choosing the Mirror Display option may also work in this scenario.
Why can’t my MacBook connect to my projector?
If your MacBook does not recognize the projector even after connecting with a cable and adapter, reset the System Management Unit and Non-Volatile RAM. This will clear out the older display settings, which may have been corrupt.
How do I enable HDMI output on my Mac?
You can enable HDMI output on a Mac by going to System Settings/System Preferences. Click Sound and select the HDMI device in the Output pane.
Why is my projector not displaying my laptop screen?
Inspect the cable connections to confirm that they are working. Change the display resolution, as the current Mac resolution may not be compatible with the projector. Adjust the resolution from System Preferences and Display.
How to connect the projector to a MacBook using a USB?
Get the USB that works for both the MacBook and the projector. Choose from USB-A or USB-C, depending on the system. Establish the connections and adjust display settings.


![How to Record Audio on MacBook? [Step by Step]](https://www.hollyland.com/wp-content/uploads/2024/05/how-to-record-audio-on-macbook-step-by-step.jpg)