


Are you a gamer streaming with OBS? You’ve likely seen missed frames due to rendering lag. Do you know what causes it and how to fix it?
Rendering lag occurs when the system struggles to generate frames quickly enough to match the display’s refresh rate. This leads to missing frames and a noticeable decrease in the quality of the experience. To fix it you may try to optimize the OBS setting such that it doesn’t strain the GPU. For instance, you can try reducing game scenes or the frame rate.
How to do so? In this guide, we have comprehensively explained some of the fixes pro streamers have revealed over different forums. Let’s start understanding the problem in detail before we fix it.
Table of Contents
What is ‘Frames Missed Due to Rendering Lag’?
If you checked your streaming stats, you might have seen the term ‘Frames missed due to rendering’. This value, in percentages, indicates a condition where the frames that constitute a video are not displayed or are skipped because the system can’t render, or generate, them in time. This lag can disrupt the smooth visual experience expected in video games or streaming content.
From a technical viewpoint, if the rendering time per frame is longer than the time allocated per frame (1/FPS, where FPS is the frames per second), then frames will be missed. For example, if a game runs at 60 FPS, each frame has approximately 16.67 milliseconds to render. If the rendering takes longer than this, then frames are missed, leading to rendering lag.
Causes of Frames Missed Due to Rendering Lag
Rendering is a hardware GPU issue, however, some claim that network issues may also cause a lag. Here are the major causes why frames get missed:
Inadequate Hardware:
A graphics card that lacks the necessary power can struggle to render frames quickly enough, leading to missed frames.
Overwhelming Graphics Settings:
Running games or applications at high resolutions and detail levels can overwhelm your system. For instance, you’ve chosen a high-resolution stream rate, which puts strain on the GPU, which ultimately misses frames while rendering.
Network Instabilities:
An unstable internet connection with fluctuating speeds can lead to dropped frames as the system struggles to maintain a consistent upload stream. Similarly, the limited upload bandwidth can hinder the streaming quality. This usually is the case when your network is shared across multiple devices.
Resource Competition:
Other devices on the same network using substantial upload bandwidth can cause dropped frames by straining the available bandwidth. Moreover, if you’ve concurrent large file uploads or active torrent seeding parallel to streaming, the upload bandwidth is fully utilized.
How to Fix Frames Getting Missed Due to Rendering Lag?
This is one of the most common issues faced by the streamers. However, there isn’t one solution to fix this issue, as the causes could vary from system to system. We have listed down the top fixes that have worked for others; you can try them too.
Downscale your Stream Output Resolution
High resolution requires more computational power and bandwidth, which strains the fragile system. By downscaling the resolution, you can reduce that load. This may help especially if your network isn’t strong or stable enough to upload at high speeds.
Here’s how to Downscale the stream resolution in OBS:
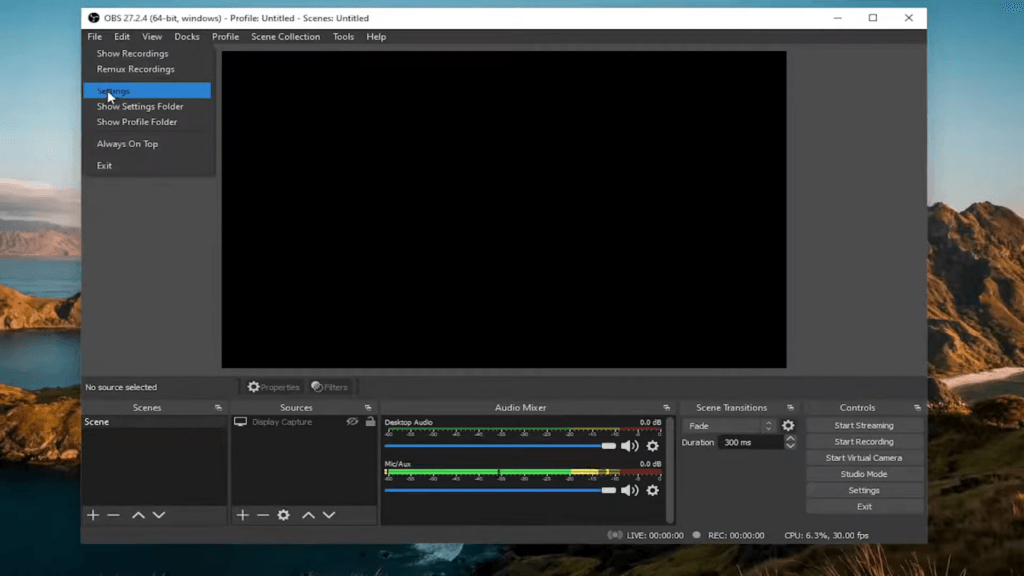
- Launch the OBS Studio application on your computer.
- Navigate to the “File” menu on the top left. Then, select “Settings.”
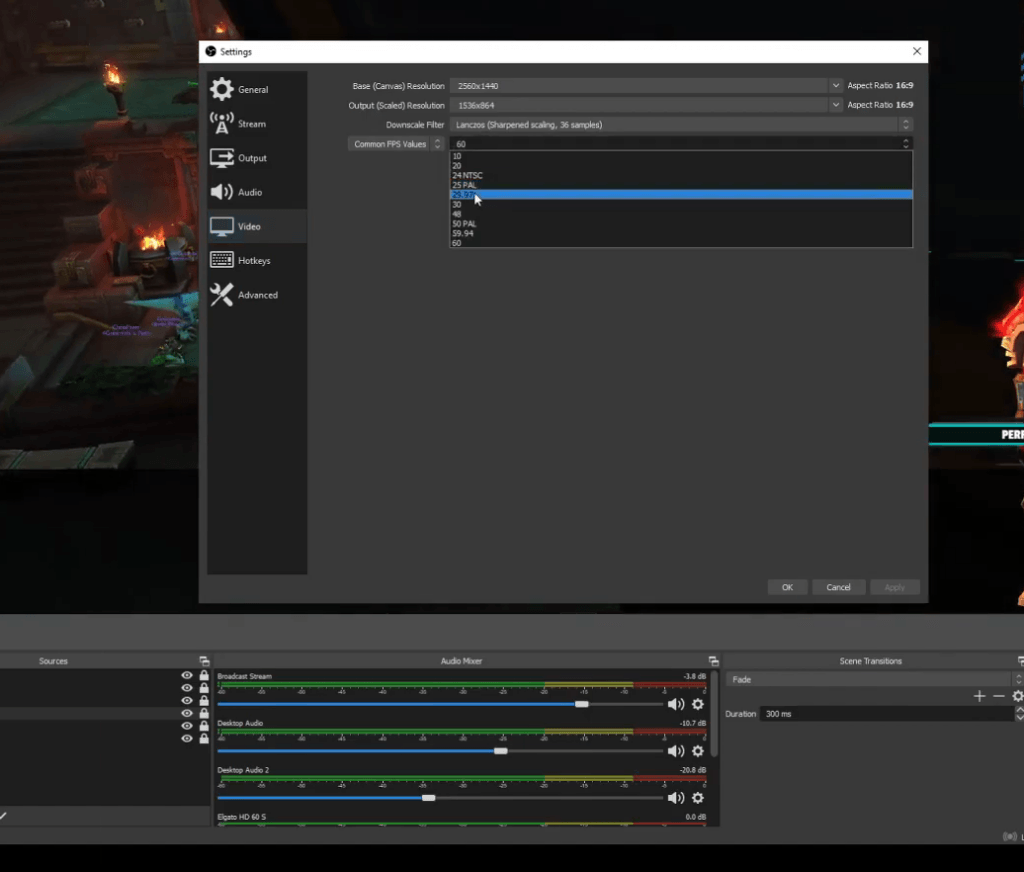
- In the settings menu, select the “Video” tab to access video settings. Here, you will see the “Base (Canvas) Resolution.” This is the resolution at which you are capturing your content. You can leave this as it is.
- Below the Base (Canvas) Resolution, find the “Output (Scaled) Resolution.” This is the resolution at which your stream will broadcast. Select a lower resolution from the drop-down menu. If it was 1440p earlier, move down to 1080p.

- After selecting the desired lower resolution, click “Apply” or “OK” to save the changes.
Enable Hardware Encoding in OBS
Hardware encoding is a process that offloads the video encoding tasks from the CPU to the Graphics Processing Unit (GPU). This results in more efficient handling of video encoding and, consequently, a smoother streaming experience.
If you have dedicated a graphics card, which you should have as a gamer, then make sure hardware encoding is enabled on OBS.
It’s a fairly simple process, just follow these steps:
- Navigate to the settings in the OBS. “File” > “Settings”.
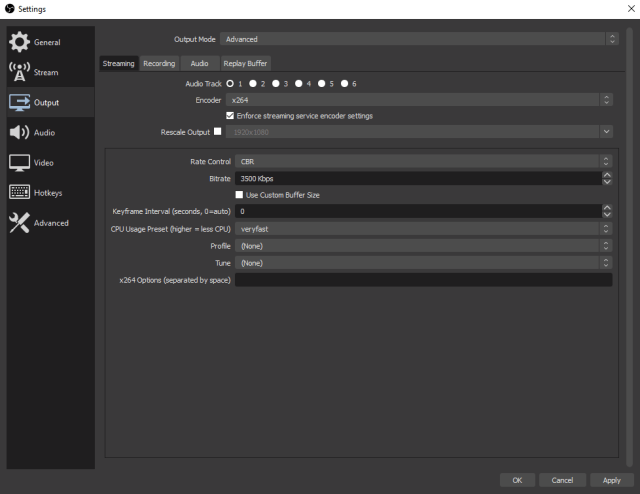
- In the settings menu, select the “Output” tab to access the output settings.
- Under the “Streaming” section of the output settings, you will find the “Encoder” option. Click on the drop-down menu next to it.
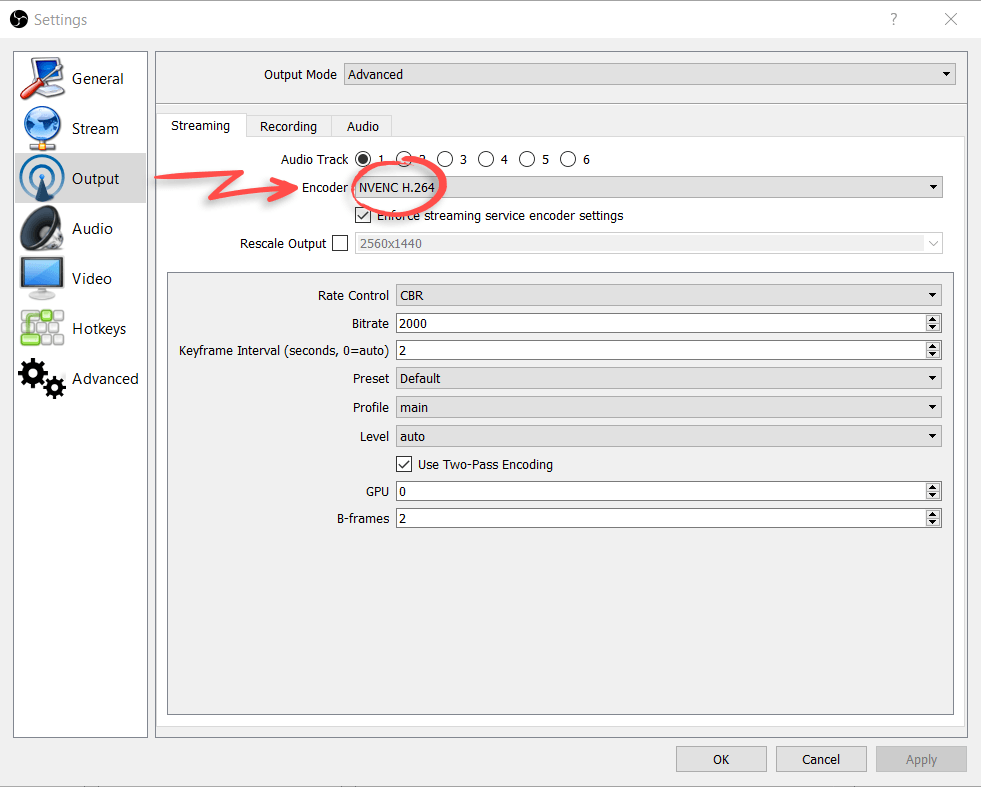
- From the drop-down list, select a hardware encoder. The exact name will depend on your graphics card, but it usually contains terms like “NVENC” for Nvidia graphics cards or “AMF” for AMD graphics cards.
- Click ‘Apply’ to Save changes and exit.
Hide Extra Gaming Scenes
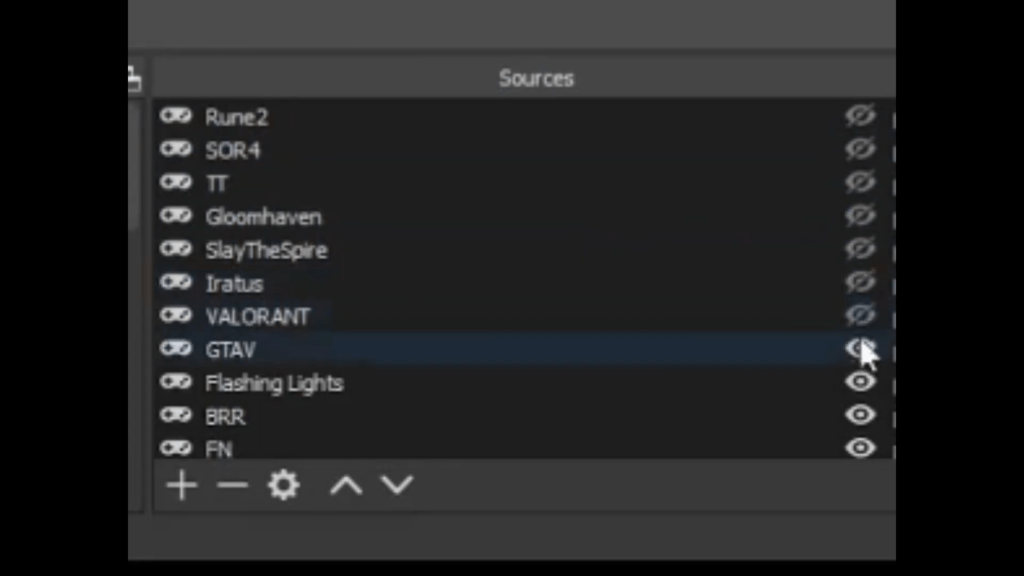
Extra gaming scenes could also be the culprit. Every time you open OBS it loads all the scenes from sources, whether you’re using those games or not. It’s like having too many tabs open—each one is hogging a bit of your computer’s brainpower.
When you keep your gaming scenes to a minimum, focusing only on the ones you actively need, you’re basically giving your CPU less to juggle. Removing them is just a breeze, move down to the scenes section, and start hiding the scenes you don’t need.
Optimize Framerate (FPS) and Bitrate of Streams
I have used the word, ‘bitrate’ a lot. It is basically the amount of data processed per unit time (kb/s). In simple words, it means how many bits are transferred per second. The larger the bitrate the larger the clearer the image is, but it does demand more Internet connection speed. Another term is frame rate, which means how many images (frames) of the video are rendered per second. A greater fps means a smooth transition and more details.
To avoid frames getting missed, you need to optimize these values based on your system. If it’s lagging, consider reducing the values.
- To change the bitrate. Move to ‘file’, then, ‘setting’. Select the ‘Output’ tab.
- Under the “Streaming” section, locate the “Bitrate” option. Depending on your internet upload speed and the system’s capabilities, set an appropriate value. A bit rate of 2500 to 4000 Kbps is a good starting point for 720p streams. If it’s already 4000, consider lowering it down to 3500.
- To change the frame rate, select the “Video” tab from Settings.
- Locate the “Common FPS Values” and select an appropriate framerate. A value of 30 is usually sufficient for a smooth stream, but if your system can handle it, 60 will provide even smoother motion.
Enable Network Optimization
Network optimization means managing the network such that it prioritizes OBS traffic over other applications. This helps when multiple applications are using the same network.
To enable network optimization on OBS, follow these steps:
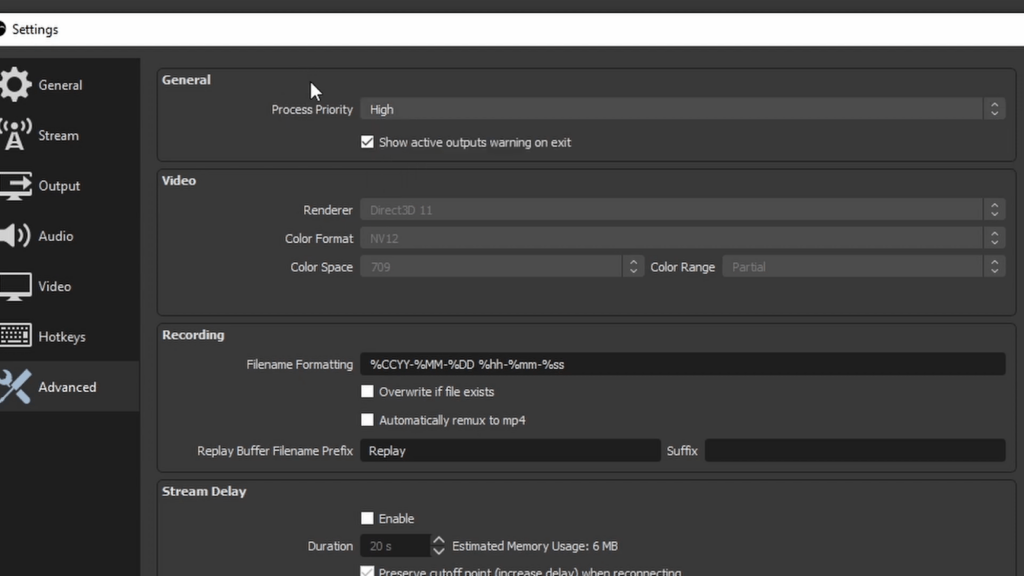
- Navigate to “Settings” and then to the “Advanced” tab.
- In the ‘Process Quality’ drop down, which may be set as normal. Change it to high.
- Scroll down to Network Setting. Check the boxes next to ‘dynamically change bit rate’ and ‘enable network optimizations’
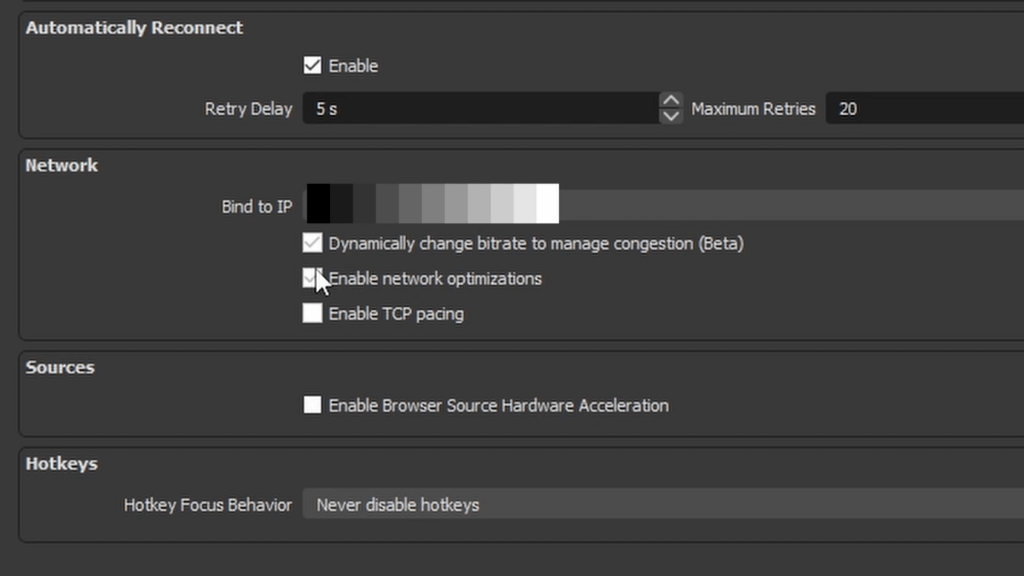
- Click ‘Apply’ and ‘OK’ to save changes.
Run OBS As Administrator
Running OBS with administrator privileges enables it to access system resources more freely and can prevent other applications from hogging necessary resources.
To do so:
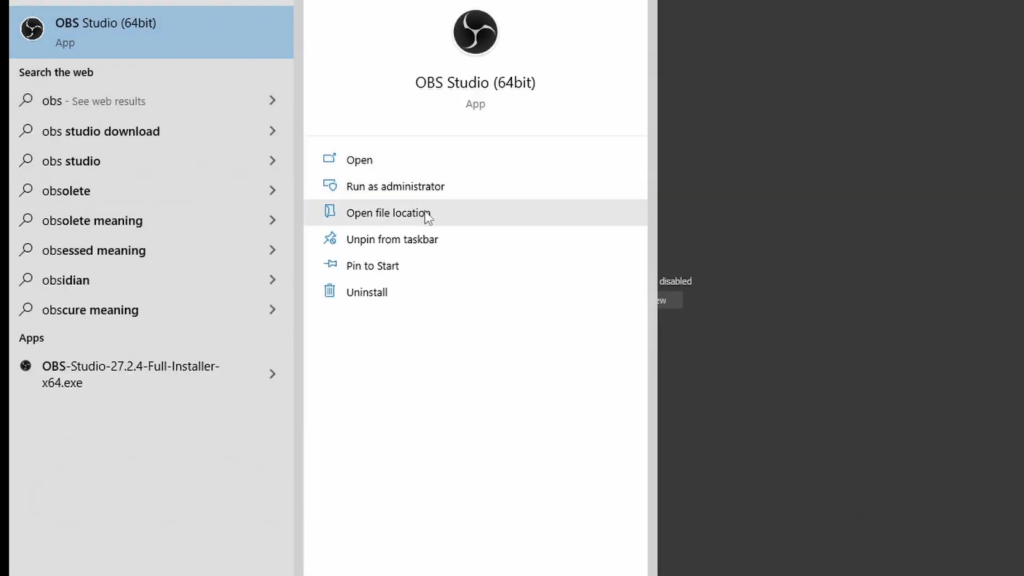
- Search “OBS Studio” in the Windows Search bar.
- Then, right-click to open its location.

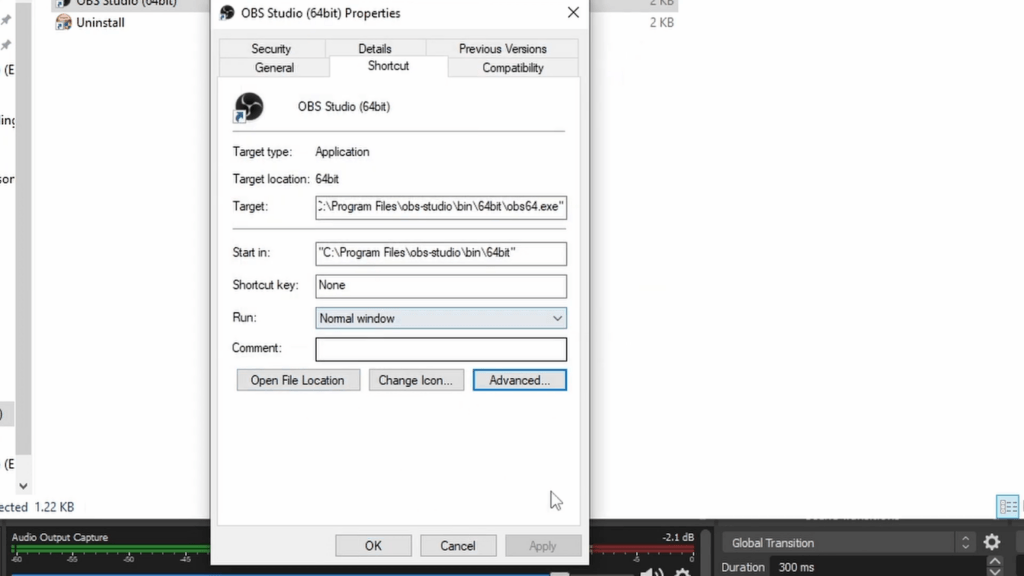
- Right-click the app shortcut and select ‘Properties’. You may click run as an administrator option. However, it will just run for that instance.
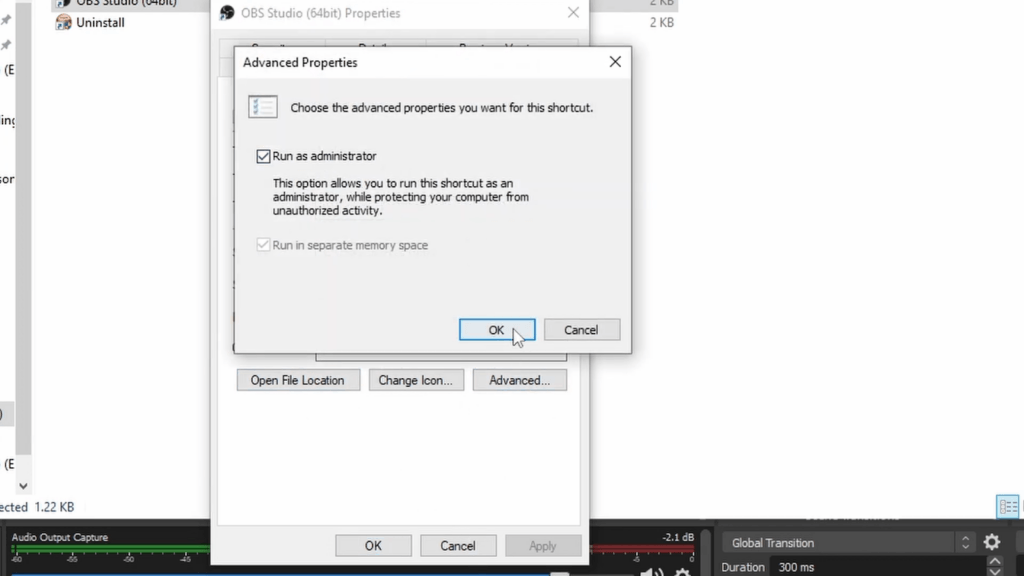
- Move to the ‘Advanced Tab’ and check the box, “Run as administrator.”
Network Fixes
We have covered fixes within the OBS settings. However, some changes within the network could also fix the problem. For instance:
Troubleshoot the network hardware. A malfunctioning router may slow down your Internet speed, so bypassing the router and connecting your modem directly to your computer could resolve the issue.
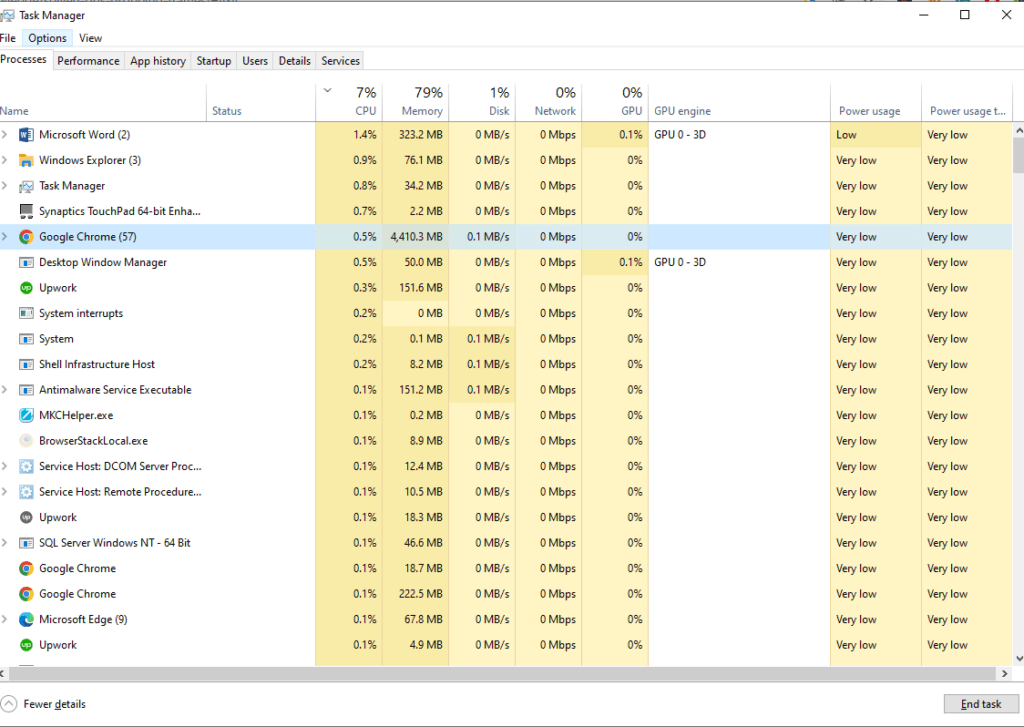
Close Bandwith Hogging Apps. When multiple programs are running in the background and occupying your network resources, OBS lag sand gets stuck in dropping frames. Use the Task Manager to end tasks that consume the most traffic. Your browser may be one of the culprits.
Change the Servers. If the recommended or default server is leading to dropping frames, switching the server in OBS settings can help.
Check Firewall. The firewall may interfere with the streaming of OBS. Temporarily disable the settings and check if it fixes the issue.
FAQs
Why are my OBS frames lagging?
Your OBS frames could be lagging due to settings that strain the GPU, like high FPS, bitrate, or having multiple gaming scenes. Additionally, a shared or incapable network may also be contributing, preventing the rendering of all frames efficiently.
How do I fix frames missed due to render lag?
To address frames missed due to render lag, start by optimizing your OBS settings. Downscale your stream’s output resolution and enable hardware encoding to allow your GPU to share the streaming load. Additionally, adjust the bitrate and framerate to balance quality and performance, based on your system and network capabilities.
Conclusion
Frames missed due to rendering lag is a common issue encountered by OBS streamers. The problem requires diverse solutions as the causes can vary significantly based on individual systems.
We have highlighted seven tried-and-tested fixes that have proven effective for many users. As there’s no one-size-fits-all remedy, we encourage you to experiment with these solutions and share which method/s worked best for you.