Ever wondered how YouTube TV DVR works? Imagine an inexhaustible repository of your preferred shows, sports events, or films that you can access and store anytime – this is what YouTube TV DVR offers. Imagine an infinite bookshelf where you can stack countless episodes of “The Office,” “Friends,” or whatever tickles your fancy – that’s YouTube TV DVR for you!
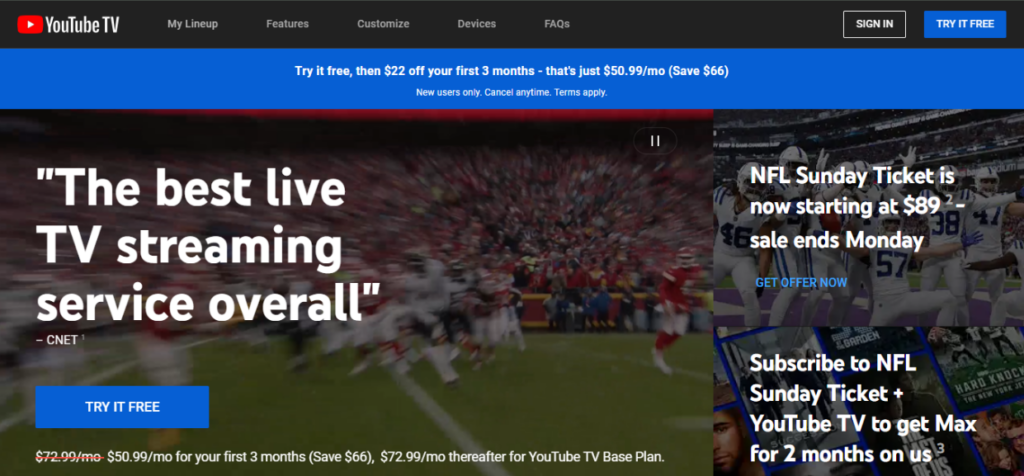
This post will pull back the curtain on this magic show. We’ll explore how this virtual recording wizardry operates and how it enables us to hold onto those precious moments in television history. By the journey’s end, not only will we uncover its nuts and bolts but also learn about its tricks, from starting recordings with just a click to managing them efficiently.
Join us in this blog as we break down how YouTube TV DVR works, making the whole process easy.
Table of Contents
Understanding YouTube TV DVR
If you’re new to live streaming, you might ask yourself: “How does YouTube TV DVR work?” Don’t worry; we have got your back. Here’s a rundown of how this game-changing feature functions.
- The Mechanics of Cloud-Based Recording

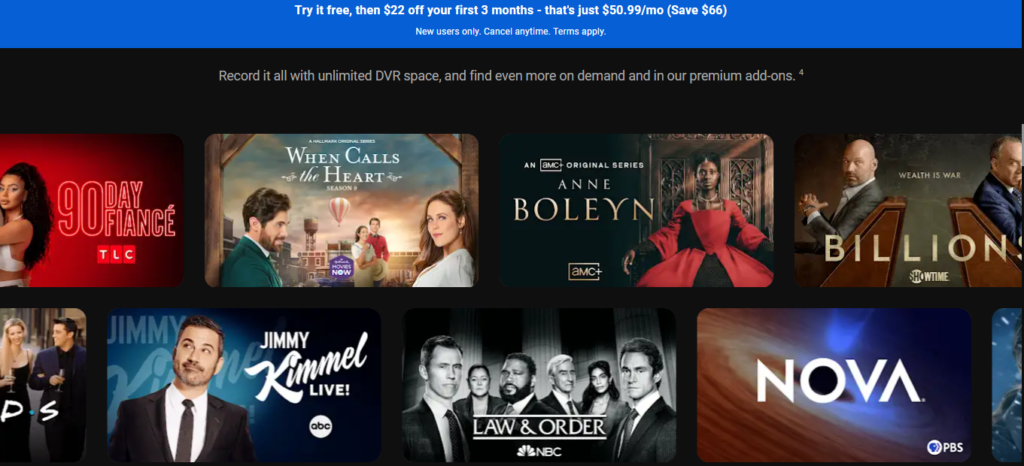
YouTube TV’s DVR functionality works using cloud technology. Unlike traditional DVRs that store recordings locally in set-top boxes, YouTube TV‘s cloud-based approach lets it store all your favorite shows online. This tech marvel allows for some serious recording power and flexibility.
You’ll love this – YouTube offers unlimited storage space for recordings. That means no more having to delete old episodes so that you can record something new. The cherry on top? All your recorded content is stored online for nine months.
Apart from being able to record tons of content without worrying about running out of room, another perk of a cloud-based system like YouTube TV is its ability to let users access their recorded shows across different devices, whether it’s through the web browser or via the dedicated app on smart TVs and mobile devices.
- Navigating the Interface
Moving onto navigating around this fantastic tool – starting with recording on YouTube TV involves searching for a show (you’ll find that magnifying glass icon super handy here), selecting it, and adding it straight into your library. You can then start watching whenever suits you best.
This nifty interface also enables quick management options right at your fingertips, from organizing by categories or series name to setting up scheduled recordings ahead of time – giving total control over what gets saved in one centralized spot called the ‘Library’ tab, which hosts all these excellent features together, making them easy peasy lemon squeezy to use. To start recording on YouTube TV, navigate the user-friendly interface:
- Live TV and Sports Events

You might be wondering about live events; well, YouTube TV’s DVR shines here too. Whether it’s a major sports event or your favorite prime-time show airing live, you can record all that action just like regular programs. The ability to capture these moments as they happen brings the excitement of live TV right into your library for replay anytime.
Getting Started with YouTube TV DVR
You’ve made the leap to YouTube TV, and you’re ready to explore its DVR features. Let’s take a walk through how this service can revolutionize your viewing experience.
- Navigating the Interface
The first thing you’ll notice about YouTube TV is its clean, intuitive interface. But before we start recording on YouTube TV, it helps to get familiar with navigating around.
Step 1: Upon opening the YouTube TV app or web browser version, look for a magnifying glass icon – your search function.
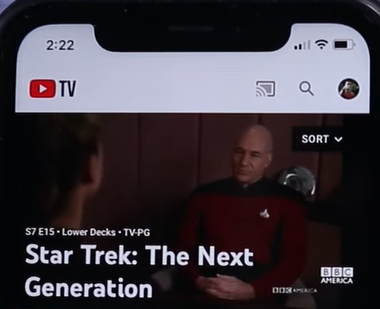
Step 2: A quick tap or click opens up a world of content possibilities, from live TV shows to sports events and more.
Step 3: If you need help finding something specific, like ‘how does YouTube, tv DVR work,’ just type keywords into that handy little box. Once found, selecting it adds it straightaway to your library- making for an efficient process.
- Diving Into Recording Live TV on YouTube TV
Using the YouTube TV DVR feature effectively requires only a few simple steps.
Step 1: Find what interests you: maybe some late-night comedy or nail-biting drama?
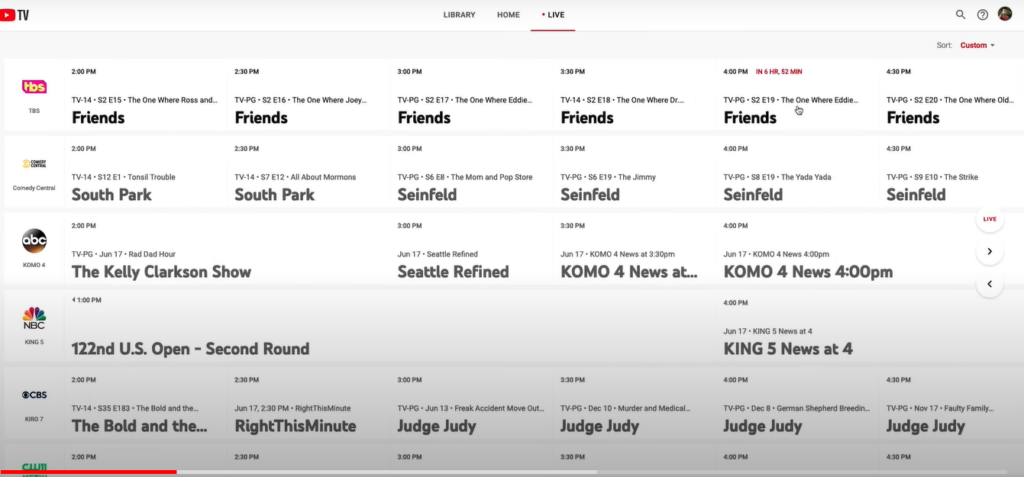
Step 2: Then hit that plus sign (+) next to each program episode name; now, they’re set for automatic recording whenever they air.
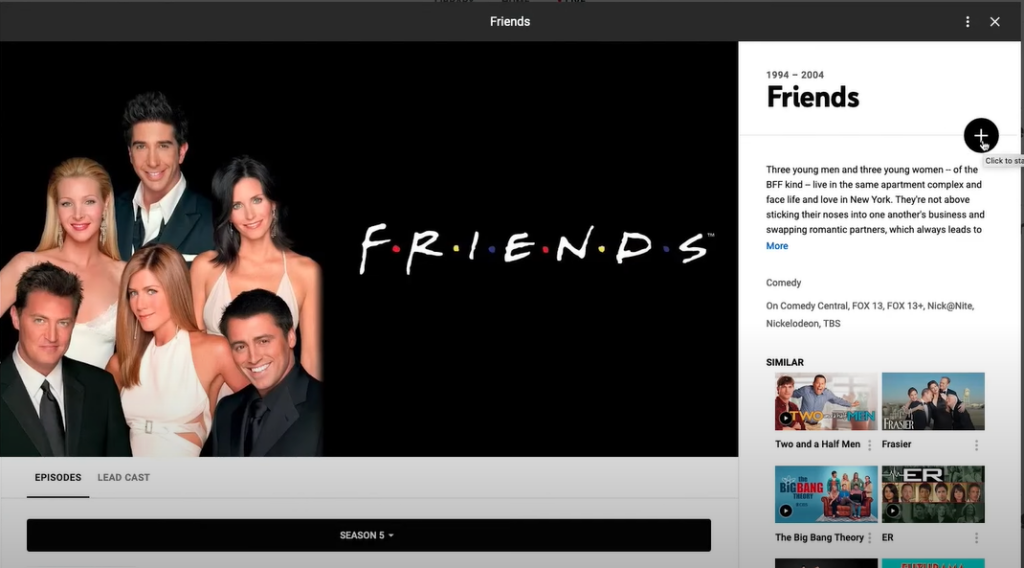
This ability lets us record tons of content and brings peace, knowing there are no storage space limitations (thanks to cloud-based technology). Allowing users access anytime within nine months post-recording – because who doesn’t love re-watching their favorite moments?
- Scheduling Recordings Ahead of Time
In addition to spontaneous recordings on the go using the mobile app or smart TV platform, planning has never been easier with scheduled options. Discover your desired show, game, or event and add it to your collection.
Not only can you record live sports events for later viewing, but you can also set future recordings scheduled ahead of time – never miss a moment again. The convenience factor is real with YouTube TV’s DVR feature.
- The Beauty Of Unlimited Storage
Discover the allure of boundless storage with YouTube DVR. Have you ever found yourself in a situation where you’re compelled to engage in activities that don’t align with your preferences? It’s a universal encounter.
Yet, with the beauty of unlimited storage on YouTube, those constraints are lifted, allowing you to capture and keep the moments you cherish without hesitation. No longer constrained by limitations, you can enjoy the freedom to curate your digital experience effortlessly.
Managing Your Recordings on YouTube TV DVR
You’ve recorded your favorite shows, sports events, and movies on your YouTube TV DVR. But now what? How do you manage these recordings to keep them organized and easily accessible? Let’s dive into the details.
- Accessing Your Recorded Content
Step 1: To start watching your recordings, you only need a YouTube TV app.
Step 2: After opening it up, look for the Library tab – this is where all of your saved content lives.

Step 3: Here, you can find everything from live sporting events to beloved sitcom reruns that have been recorded with the help of cloud-based recording technology. This setup allows users to watch their chosen programs whenever they like.
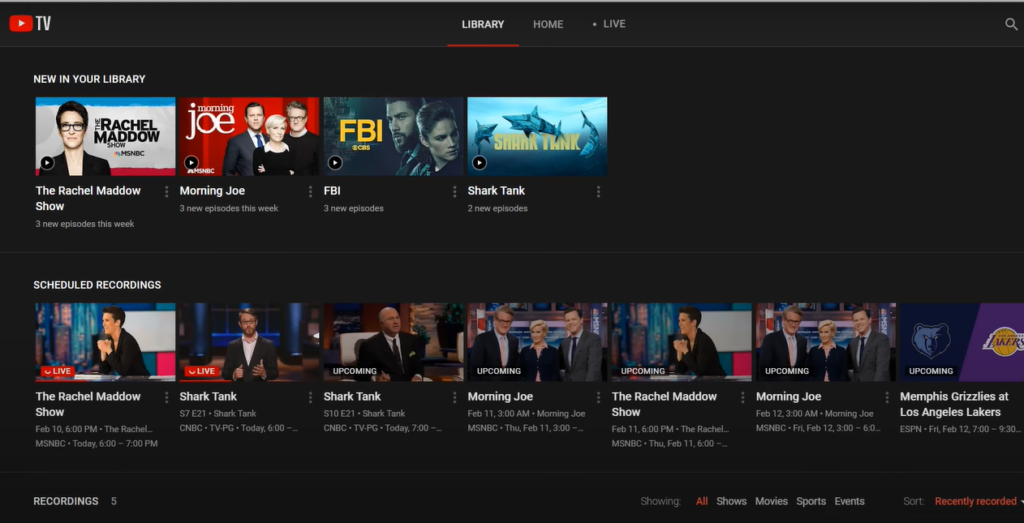
Step 4: Select a category or program in this section, and voila! You’re ready to kick back and enjoy your pre-recorded show or movie at your leisure. No more rushing home for prime time.
- Delete Recordings When Necessary
The beauty of a YouTube TV DVR lies in its ability to record and its functionality when it comes to managing storage space effectively. Sometimes, we might record things out of curiosity only to discover later that they don’t pique our interest, so how does one delete such unwanted content?
Step 1: Launch the YouTube tv app on your device.
Step 2: Look for the ‘Library’ tab, usually located in the menu or toolbar. Tap or click on it to access your saved content.
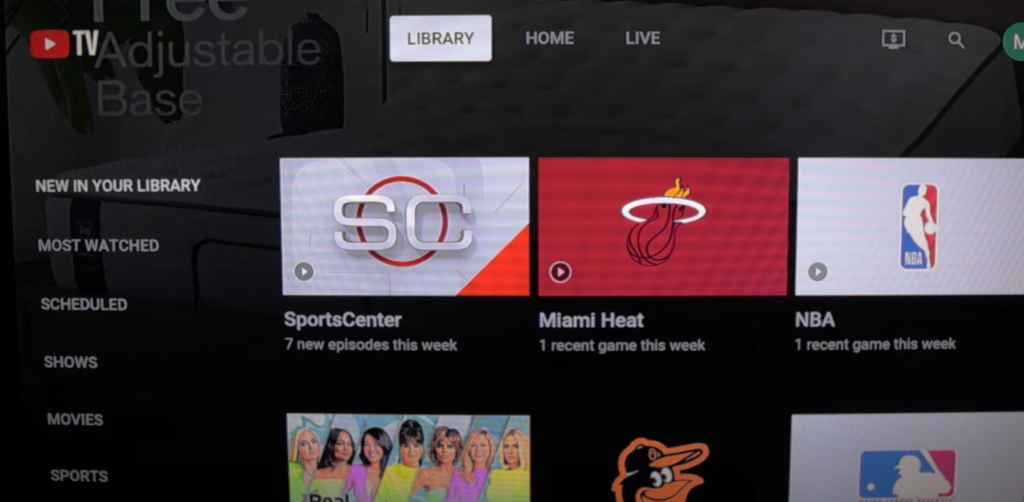
Step 3: Within the ‘Library’ section, locate the recording you want to delete.
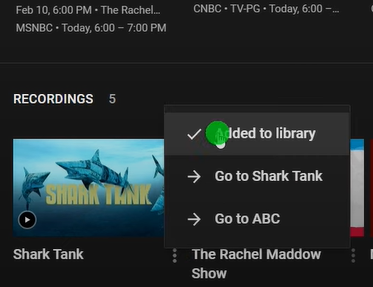
Step 4: There should be an option (such as 3 dots) associated with each recording.
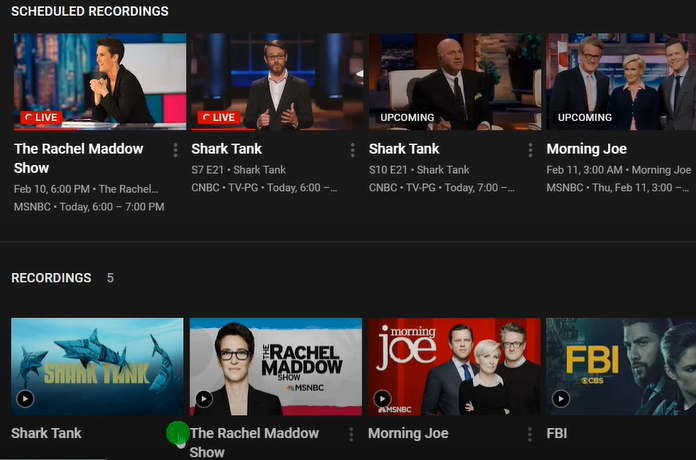
Select the recording you wish to remove and uncheck the Add to Library option.
- Organizing Your Recordings Efficiently
We often record tons on YouTube TV, making organizing crucial for quick access during those cozy binge-watching nights.
A handy feature allows us to categorize different shows into separate folders. Organizing shows into folders lets you quickly find the episode you’re looking for without searching through hundreds of recordings. The system is user-friendly and intuitive – perfect even if technology isn’t your strongest suit.
With these tips, managing YouTube TV DVR storage will be a breeze. Remember, organization is critical to making the most of this fantastic feature.
Tips and Tricks to Master YouTube TV DVR
Unlocking the full potential of YouTube TV DVR can significantly enhance your streaming experience. From organizing your library to skipping commercials, here are some tips and tricks to make the most out of YouTube TV’s DVR feature.
- Navigating Filters on Your TV
Step 1: Open the YouTube TV DVR on your TV set.
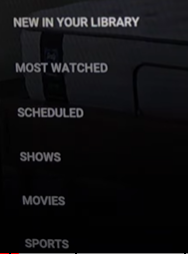
Step 2: On the left side, you’ll find filters for your TV in the ‘Library.’
Step 3: ‘Most Watched’ and ‘Scheduled’ are readily available.
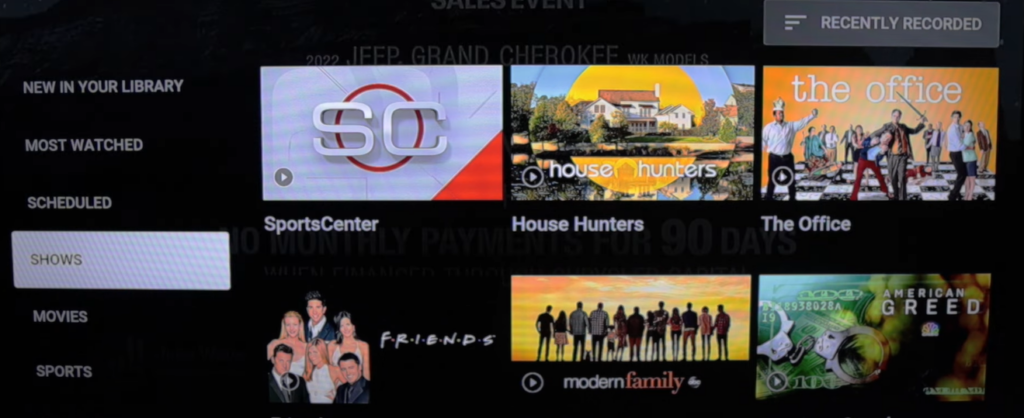
Step 4: For additional options, click on any show, and on the upper right, find options to organize recordings by alphabetical order, trending, and most popular.
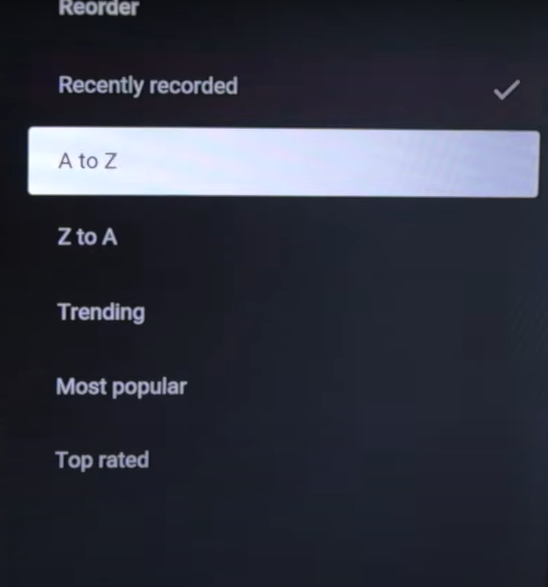
- Recording Options and Limitations
When recording a series, all new episodes and reruns are recorded automatically. Unfortunately, there’s no option to record a single series episode.
However, you can record a single game or multiple games for sports. The Marcus watched feature will come in handy. It’s available on phone and TV.

- Marking a Video as Watched
Since YouTube TV doesn’t allow recording or deleting a single episode, use the ‘Mark as Watched’ feature.
Step 1: From your library, select a program, for example, Health Hunters.
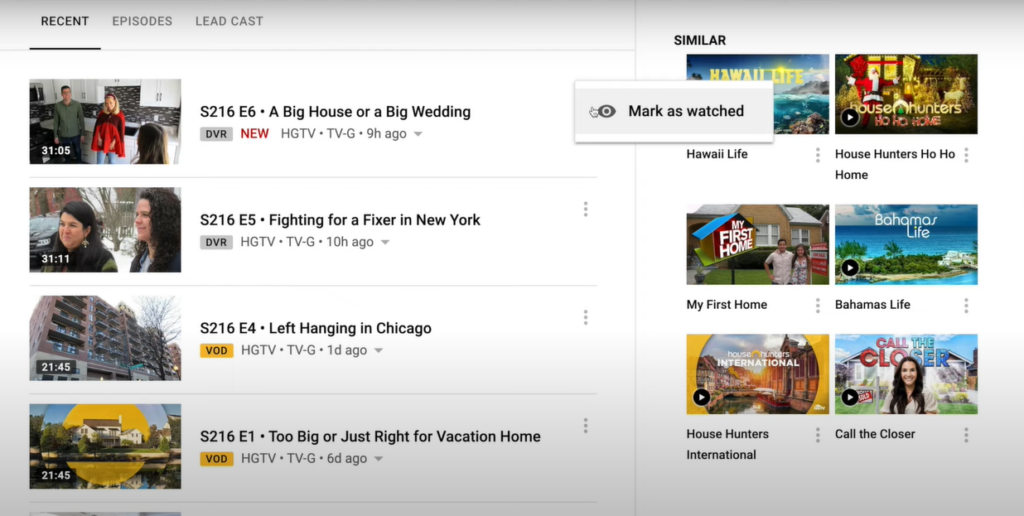
Step 2: Find the episode marked as watched. It is as simple as tapping three dots and marking an episode as watched.
- Avoiding Commercials
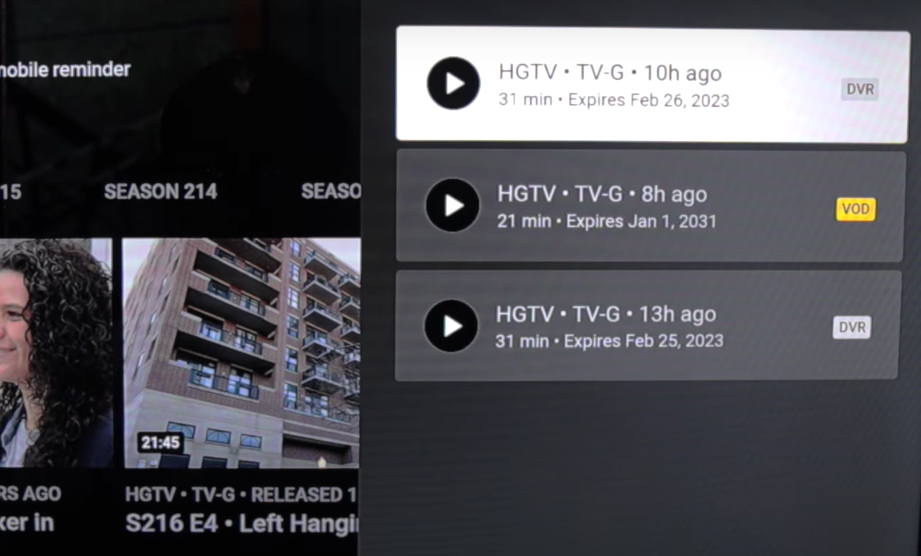
Opt for DVR over VOD (Video on Demand) to skip ads. If presented with the VOD option, choose DVR. Recordings allow you to fast-forward through ads, but remember, ads are not removed from the recordings.
- Options for Playback
For most recordings, start watching from the beginning to catch every moment.
For live sports or news programs, go to the ‘Library’ section and scroll down to the ‘Scheduled’ section.
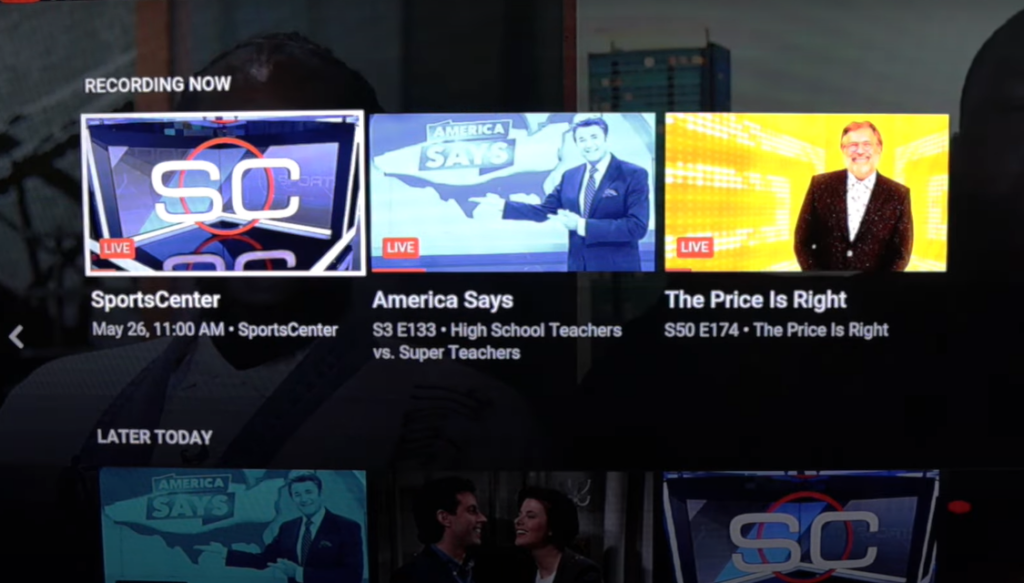
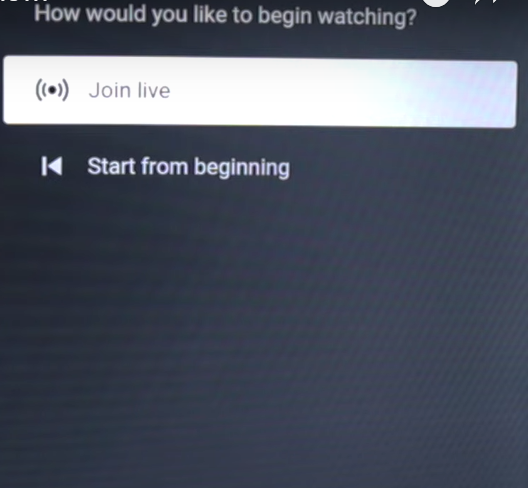
Select a recording airing live, like ESPN Sports Center, and choose to join live or start from the beginning. Use fast forward to skip ahead.
Use the ‘Key Plays’ feature to catch up on the action for select sporting events in your library.
Comparing YouTube TV DVR with Other Streaming Services
You might wonder how YouTube TV’s DVR feature stacks up against other streaming services. Let’s compare the two, focusing on their storage limits and features.
- Evaluating Storage Limits
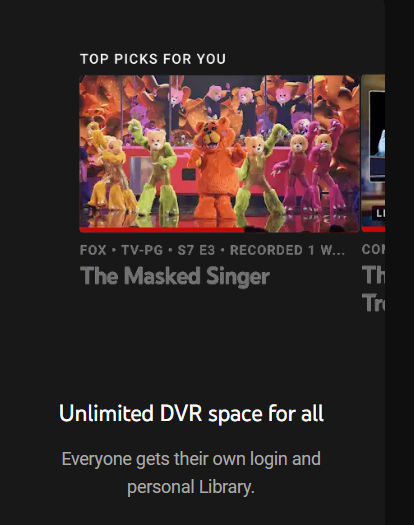
Storage is crucial when it comes to recording your favorite shows. Unlike traditional cable or satellite DVRS, cloud-based services offer varying storage flexibility. So, let’s take a peek at what each service brings to the table.
YouTube TV outshines most competitors by offering unlimited storage space for its recordings – an unparalleled advantage in this field. It stores these online for nine months, which means you can binge-watch all those recorded episodes over three-quarters of a year.
Moving onto other platforms like Hulu + Live TV and Sling TV, while they also provide cloud DVR services, their offerings are more limited than YouTube’s generosity. DirecTV Stream and FuboTV follow suit with their own set of restrictions but still manage to keep users hooked with exclusive content.
Philo, another contender in the streaming arena, has limitations similar to those mentioned above yet offers unique packages that some viewers find appealing despite their less roomy digital closets.
- Diving into Features
We should also focus on additional perks besides comparing YouTube TV DVRs vs. traditional DVRs or cable or satellite DVRs. Akin to fine dining, where garnishes play an equally important role along with main course dishes, extra features enhance the user experience beyond their primary functions.
All platforms above support multiple simultaneous streams (“users watching different channels simultaneously”). However, YouTube TV sets itself apart with its DVR feature, which lets you simultaneously record as many shows as you want. Your family no longer needs to fight over which live show gets recorded.
YouTube TV offers impressive flexibility and accessibility with its DVR feature. Users can utilize YouTube DVR on up to three simultaneous compatible devices, providing a convenient solution for households with multiple screens.
Moreover, the platform allows the creation of up to six individual accounts, ensuring personalized content preferences and DVR settings for each user. With access to live TV from over 100 channels, YouTube TV caters to a diverse range of interests, making it a comprehensive streaming solution that adapts to the viewing habits of both individuals and families.
Exploring Advanced Features of YouTube TV DVR
Diving into the advanced features offered by YouTube TV’s DVR service, you’ll find some exciting stuff. Let’s look at unlimited storage and scheduled recordings.
- Ad Skipping and Simultaneous Recording
The ability to skip ads is a feature many streaming services offer, but with TiVo, it’s automatic. No effort is needed. With YouTube TV’s DVR feature, skipping those pesky commercials isn’t straightforward; you need some strategy involved.
A surprising fact about this streaming service is that it lets you record multiple shows simultaneously. Suppose your favorite sports events are on simultaneously as your must-watch reality show, no problem. Your trusty YouTube TV DVR has got your back.
- Unlimited Storage Space
You might be thinking, “I watch so much television that there is no way any system can handle my recording needs.” But let us tell you something -YouTube TV laughs in the face of such doubts.
No matter how many soap operas, sporting events, or late-night talk shows (or all three) you want to save for later, they’ve got room for everything because they offer unlimited storage space for their DVR function. It makes binge-watching feel like a sport itself.
- Scheduled Recordings and Library Tab
Moving onto the scheduled recordings now: Have you ever had an important event clash with your favorite show? No worries anymore because this beautiful little creature called ‘Scheduled Recordings’ exists in YouTube TV’s universe.
All recorded episodes are neatly stored under what they call the library tab, where each program episode lives peacefully until you decide to watch them. It’s like your own personal, never-ending film festival.
- Start Watching Feature
Let’s discuss the ‘ start watching’ feature, which allows you to instantly begin viewing a live show or sports event while it continues recording. This unique aspect of YouTube TV’s DVR service lets you hit record on any live show or sports event and instantly begin viewing it from the start – even while it continues to record. Gone are the days of waiting for recordings to finish.
Conclusion
Unraveling the magic of YouTube TV DVR, we’ve discovered a world beyond traditional recording. A realm where cloud-based systems reign supreme, providing unlimited storage for your favorite shows and sports events
The mechanics are simple yet brilliant – just select your program and add it to the library to start recording. Remember how managing these recordings is a breeze? You can access them anytime under the ‘Library’ tab and even delete ones you don’t need anymore.
Watching live TV or catching those sporting moments on-demand is another trick up its sleeve that enhances our viewing experience. Understanding how YouTube TV DVR works has highlighted its superior features to other streaming services.
You will no longer struggle with old-school DVRs, as now, armed with this knowledge, we’re ready to embrace this new era of television watching.
FAQs About How Does YouTube TV DVR Work?
Q: Does YouTube TV really have an unlimited DVR?
A: Yes, YouTube TV offers truly unlimited cloud DVR storage. You can record as many shows or movies as you want.
Q: What is the downside of YouTube TV?
A: The main drawback is cost. It’s pricier than some alternatives, and add-ons like premium channels increase the price even more.
Q: Does YouTube TV require a DVR box?
A: It doesn’t need a physical box because it uses cloud-based technology for its DVR feature. So, everything stays online.


