


In the world of content creation, where your voice is your most potent tool, the Rode Wireless Go 2 is your trusted sidekick. It’s the bridge between your message and your audience, providing crisp, clear audio without the hassle of tangled wires. But picture this: you’re all set to start recording your next masterpiece, only to find that your Rode Wireless Go 2 is stubbornly refusing to charge. Frustration sets in, and your creative flow comes to a screeching halt.
Fear not, for in this guide, we’ll unravel the mysteries of charging woes with the Rode Wireless Go 2. From the most common issues to practical solutions, we’ll ensure that nothing stands between you and your voice. So, let’s dive in and recharge your creativity as we explore the fixes for those frustrating “Not Charging” moments.
About Rode Wireless Go 2
The Rode Wireless Go 2 is more than just a microphone; it’s a game-changer. This compact, wireless microphone system is designed for content creators, filmmakers, vloggers, and anyone who values crystal-clear audio in their recordings. With its dual-channel capability, it allows you to record two audio sources simultaneously, making it perfect for interviews, podcasts, and solo content creation. Plus, its ease of use and compact design make it a go-to choice for professionals and beginners alike.

Why doesn’t the Rode Wireless Go 2 Charge?
The inability of the Rode Wireless Go 2 to charge can be attributed to several factors. In this section of your article, we can explore the common reasons why it might not be charging:
Faulty Charging Cable
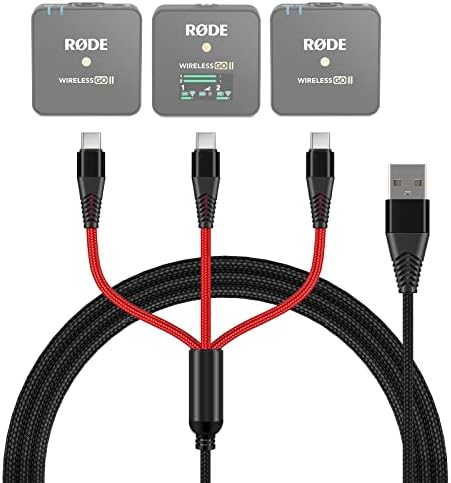
The charging cable you’re using may be damaged or not functioning correctly. Check for physical damage or try using a different USB cable to rule out this possibility.
Battery Depletion
If the battery of the Rode Wireless Go 2 has completely depleted, it might not immediately show signs of charging when connected to a power source. Allow it to charge for a while before attempting to power it on.
Firmware or Software Issues
Sometimes, software or firmware glitches can affect the charging process. Check if there are any available firmware updates for your Rode Wireless Go 2 and install them as needed.
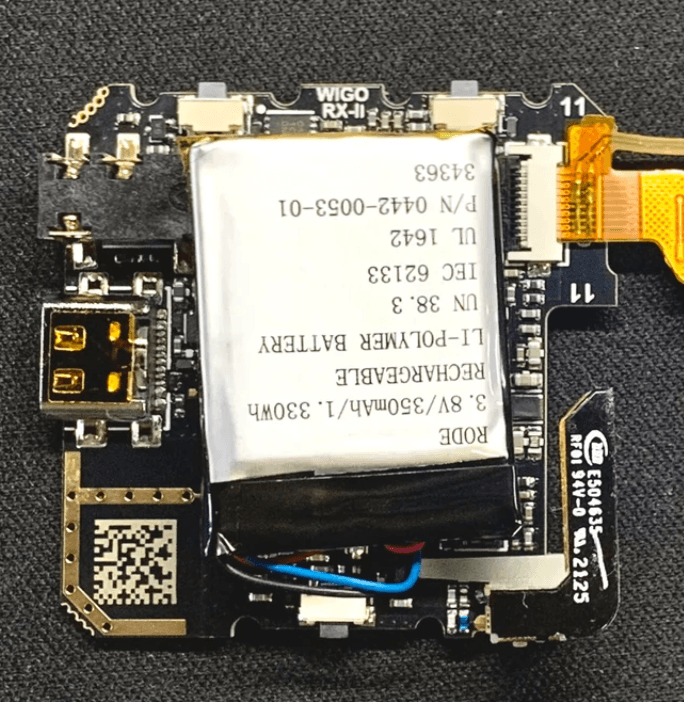
Battery Health
Over time, the battery health of any device can deteriorate. If the Rode Wireless Go 2 has been extensively used and the battery has degraded significantly, it may not charge efficiently. In this case, it might be necessary to replace the battery.
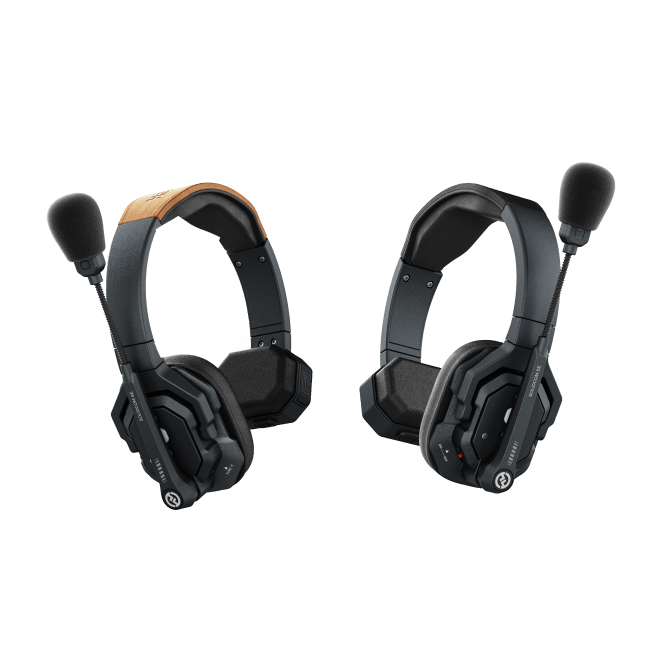
On the other hand, the Hollyland Lark M2 proves to be a solid microphone in terms of quality and battery performance, regardless of how frequently you use it. This is one major reason users prefer and recommend the Lark M2 over other wireless mics. It has numerous features with an extended battery life of up to 10 hours when fully charged. Contrarily, you can use the kit for up to 40 hours with the charging case. And most importantly, the battery in all units is made of top-notch components, which reduces the risks of worsening health over time.

2-Person Wireless Mini Button Microphone.
Learn MoreFixes To Rode Wireless Go 2 Not Charging
If your Wireless GO II isn’t reaching a full 100% charge or doesn’t charge even after a few hours, follow these troubleshooting steps:
Update Firmware: Ensure your Wireless GO II units have the latest firmware for optimal performance and potential charging issue resolution.
Try a Different USB-C Cable: If your current cable is unreliable or doesn’t deliver sufficient power, switch to a reputable third-party USB-C cable. This can eliminate charging problems related to the cable itself.
Use a Mobile Device Charger: Charging your Wireless GO II units with a mobile device wall charger can be a reliable solution. These chargers are designed to provide the right power output for various electronic devices, potentially improving the charging process.
Perform a Firmware Update with the Wireless GO 2
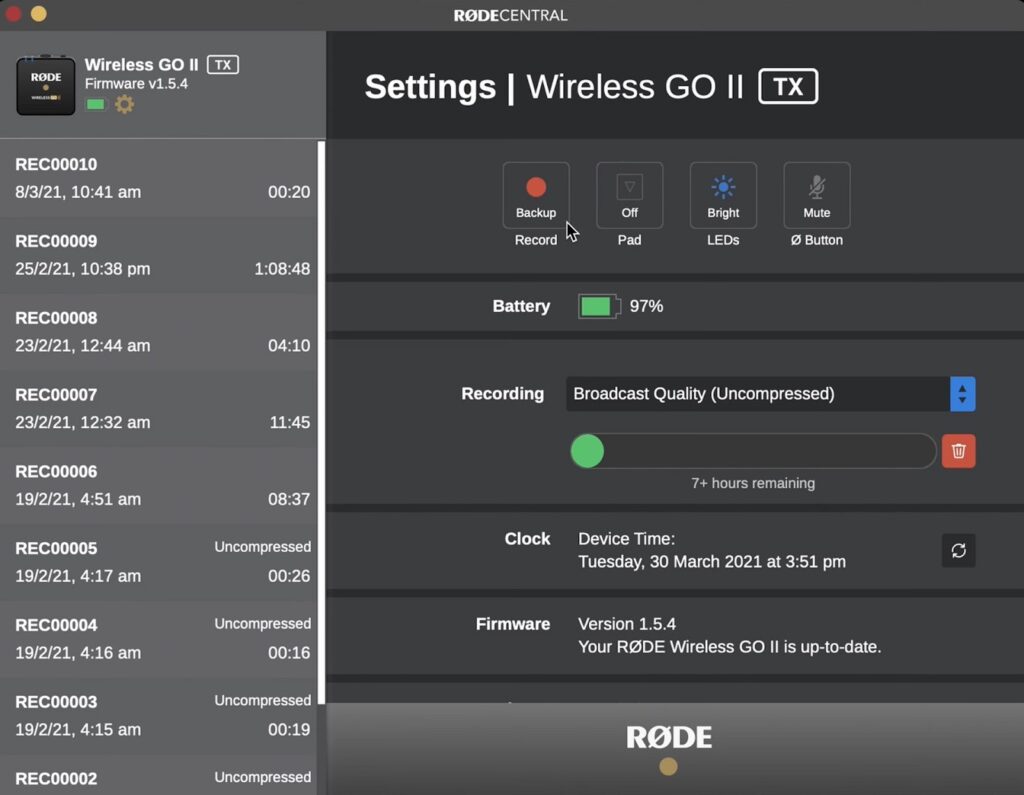
Updating the firmware of your Wireless GO II is a crucial step in unleashing its full potential. It not only unlocks new features and connectivity options but also allows you to customize and optimize your microphone. Here’s a step-by-step guide on how to perform a firmware update with the Wireless GO II:
Check System Requirements
Ensure that your computer meets the system requirements for the update. You’ll need a Mac with MacOS 10.15 or later, or a PC with Windows 10 Version 1803 or later.
Download the Latest RØDE Central Desktop App
Make sure you have the latest version of the RØDE Central desktop app installed on your computer.
Download the Latest Firmware
Download the latest firmware for your Wireless GO II from Here.
Connect Your Wireless GO II Units
Connect your Wireless GO II units directly to your computer. When connected, you’ll notice a red up arrow next to the units that require a firmware update.
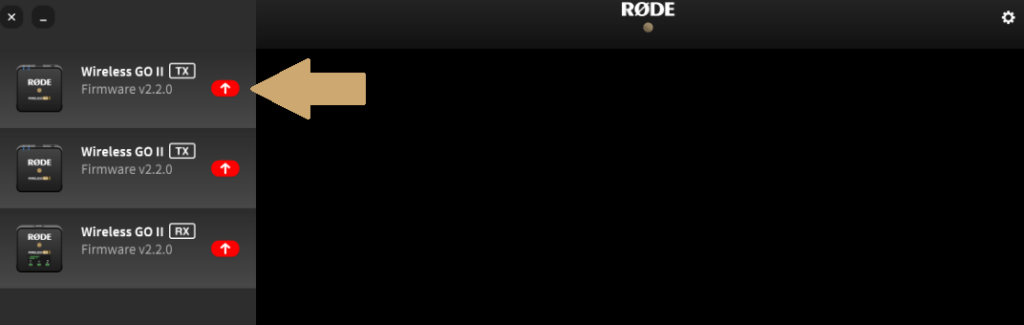
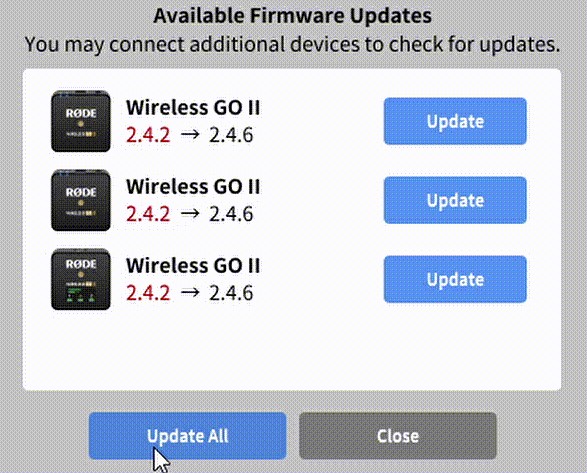
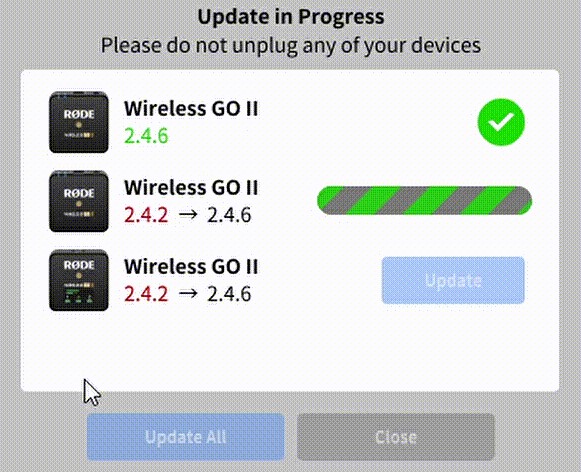
Initiate the Update
Click the red up arrow to initiate the firmware update for each Wireless GO II unit. You can choose to update them one by one or all at the same time.
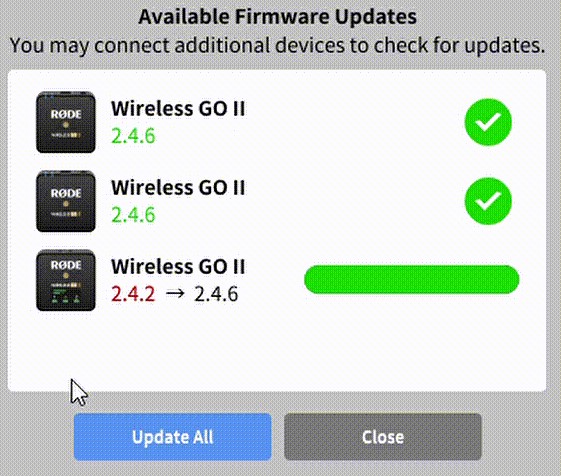
Customization and Optimization
Once the firmware update is complete, your Wireless GO II units are ready for customization. You can configure settings, activate or deactivate functions, access advanced features like fine gain control and safety channel, and optimize and export on-board recordings (desktop only). Set up your preferred recording mode and tailor the microphones to your specific needs.
Charge Effectively through Charging Case
To recharge the battery in your Charge Case to effectively ensure the charging process, follow these simple steps:
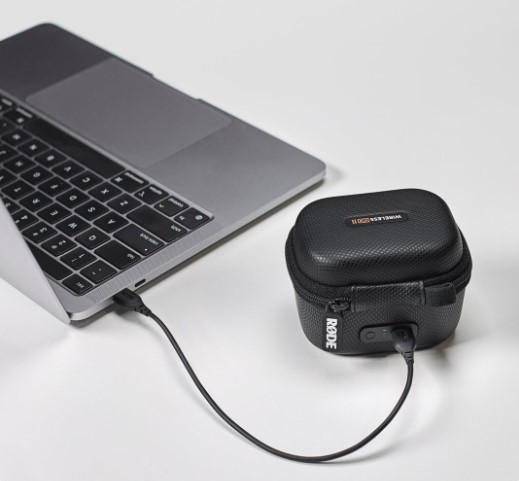
Connect the USB-C Cable
- Use one of the USB-C cables provided with your Wireless GO II kit.
- Plug one end into the USB-C port on the Charge Case.
- Connect the other end to a power source such as your computer, laptop, or a reliable USB charger.
- Ensure the power source delivers a maximum of 5V and 3A for safe charging.
The point number 4 is highly important because this is where many users make mistakes. They think all power sources can charge GO II, and they plug the case with non-recommended power sources. As a result, the case remains undercharged or gets overcharged, affecting the entire kit’s performance. Therefore, you should always remember that whether it is a Rode Wireless GO II, Hollyland Lark M2, or any of your preferred wireless mics, you should always use the correct power source to charge the case. Otherwise, you may unintentionally cause harm to the battery.
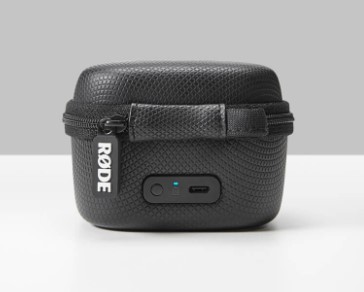
Understanding the Charge Case Status LED
The Charge Case is equipped with an LED indicator and a status-check button located near its USB-C port. Here’s how to interpret the LED status:
During Charging
When your Wireless GO II transmitters and receiver are inside the case and actively charging, the LED will display a solid blue light.
Checking Battery Level
To check the Charge Case’s battery level when it’s not connected to power, press the status-check button.
- Solid green indicates a healthy charge.
- Solid amber suggests a low charge.
- Solid red signifies a very low charge.
- Flashing red indicates a critically low charge.
While Charging the Case
When the Charge Case is connected to a power source, the LED indicates its charging status.
- Solid green means it’s fully charged (100%).
- Flashing green indicates a charge level between 50% and 99%.
- Flashing amber suggests a charge level between 10% and 50%.
- Flashing red warns of a charge level between 0% and 10%.
Conclusion
The Rode Wireless Go 2 stands as a beacon of reliability. However, even the most dependable tools can face the occasional hiccup. This guide has empowered you with the knowledge to troubleshoot and resolve charging issues with your Wireless Go 2.
From checking firmware updates to trying different cables and using optimal chargers, we’ve covered a range of solutions to ensure your Wireless Go 2 stays charged and ready to capture your creativity. Now, nothing stands between you and your voice. Don’t let charging hiccups slow you down. Keep your gear in top shape, and let your content shine. Remember, your voice deserves to be heard, loud and clear.
Your feedback is invaluable to us. Have you found this guide helpful in addressing your Wireless Go 2 charging issues? Did you discover other solutions or have tips to share with the community? We’d love to hear your thoughts and experiences. Share your feedback and reviews in the comments section below. Your input can help fellow content creators overcome similar challenges and keep their creative journeys on track.
Frequently Asked Questions
How long does it take to charge the Rode Wireless Go 2 battery?
The built-in 3400mAh battery fully charges in two hours and can power the Wireless GO for up to three sessions. The charging case can also serve as a power bank for various devices like smartphones, tablets, and GoPro cameras.
How long does the Rode Wireless Go 2 battery last?
The battery is rated for approximately 7 hours of usage. Both the transmitter and receiver charge via USB-C, and a black pouch is included to conveniently store the RODE Wireless GO transmitter, receiver, cables, and windshield.
Is there a firmware update available for the Rode Wireless Go?
Yes, to update the firmware for your Rode Wireless GO II, you can use the RØDE Central desktop app. Connect your Wireless GO II units to your computer, and if a firmware update is needed, you will see a red up arrow next to the units that require an update.
Does the Rode mic need to be charged?
Yes, it’s important to keep your Rode microphone charged to ensure it’s always ready for use. Charging your Rode microphone correctly is essential, whether you’re a professional sound engineer or a beginner. Here’s a guide on how to do it correctly.
Why is the blue light flashing on my Rode Wireless Go?
If the blue light with a connection symbol next to it on your Rode Wireless GO 2 transmitter and receiver is flashing, it indicates a disconnection. This might occur if you move too far from the receiver or if there are obstacles between them.
Can you use the Rode Wireless GO 2 without a receiver?
Yes, a recent firmware update for the RØDE Wireless GO II allows you to access the memory inside the transmitter units as if they were removable storage devices. This enables you to store audio locally for recording without using a receiver unit.
Why is my wireless charger flashing blue but not charging?
If the blue light on your wireless charger is flashing and not charging your phone, it may be due to a metal object too close to the charging base or the phone not being centered on the base correctly. Ensure that the light is not flashing before leaving your phone unattended.
What is the blue triangle on Rode Wireless GO 2?
The little blue triangle next to channel 1 on the Rode Wireless GO 2 is the ‘Pad’ indicator, used for adjusting the gain level (volume boost). This feature may not be extensively documented on Rode’s website.
What is the DB button on a Rode Wireless Go?
You can adjust the gain level (volume boost) by pressing the dB button on the bottom side of the receiver. After setting the gain, open any audio or video recording app to start recording. Both the transmitter and receiver can be charged simultaneously using the provided USB cables.


![My Discord Crashes when I Screen Share [These 7 Fixes to Try]](https://www.hollyland.com/wp-content/uploads/2024/09/my-discord-crashes-when-i-screen-share-these-7-fixes-to-try.jpg)